Preparation
Setup
Login into the AWS Console of your own account, choose one of the supported regions and click the respective icon:
| Virginia (us-east-1) | 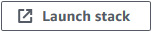 |
| Ohio (us-east-2) | |
| Oregon (us-west-2) | |
In the opened cloudformation page:
- Make sure your are in the selected region
- Accepted the default Stack Name
- Select I ackonwledge … checkbox
- Click Create stack

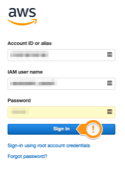
- Click the link to open the AWS Console
- Enter the provided Account ID
- Enter the provided IAM user name
- Enter the provided Password
- Click Sign In
- Make sure you are in the corrected designed region

Open the AWS Cloud9 IDE in your defined region
Before you get started you need to open the Cloud9 environment provided for this workshop.
Ads, javascript, and tracking blockers should be disabled for the Cloud9 domain, or connecting to the workspace might be impacted. Cloud9 requires third-party-cookies. You can whitelist the specific domains.
An instance of Cloud9 IDE, a powerful cloud development environment was already provisioned for you, with all the necessary files. Lets open it:
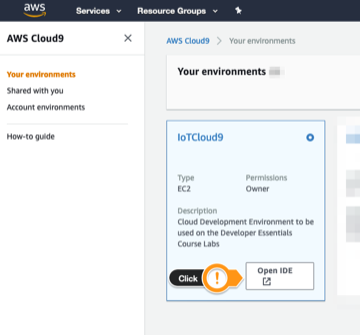
On the Cloud9 page, under Your environments:
- Locate the IoTCloud9 environment
- Click Open IDE
 Wait the Cloud9 become available and then execute the following actions:
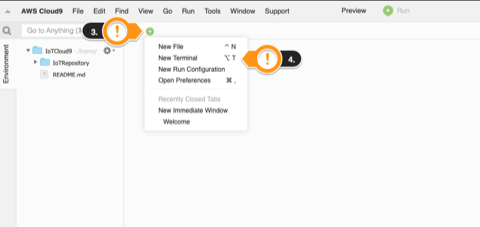
 - Close the Welcome tab
- Close the lower panel
- Click the + sign
- Click New terminal

 Before move on, lets install a pre-requisite to run the following tasks:
 - Copy and paste the following command in the Cloud9 terminal
- jq is a command-line JSON processor. For more information, see: https://stedolan.github.io/jq/.
sudo yum install jq -y - Leave the Cloud 9 IDE tab open, you will use for all this hands-on lab.
Checking your Thing Fleet
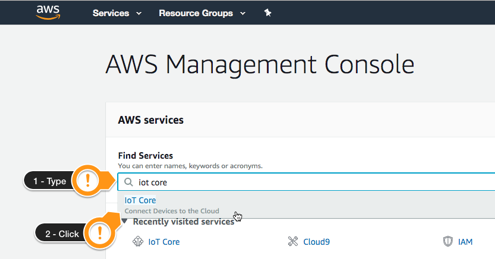
Open the AWS IoT Console:
- Type
iot coreon the Find Services field - Click on IoT Core result
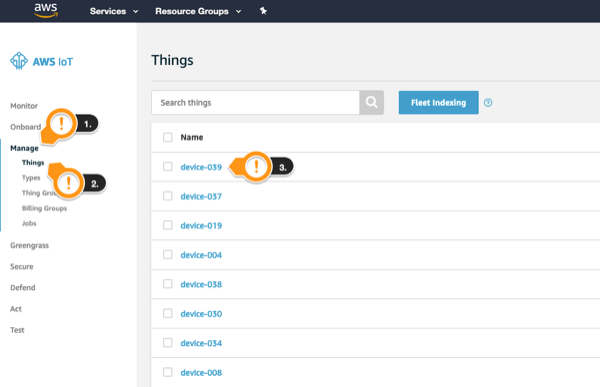
 Under the IoT Home page, on the left menu:
 - Click Get started
- Click Manage
- Click Things
- Notice the things, representing your smart air conditioning are already created and online
- On the green panel, click skip quick tour
- Click on any of the things (Your thing numbers might be different from the screenshot)
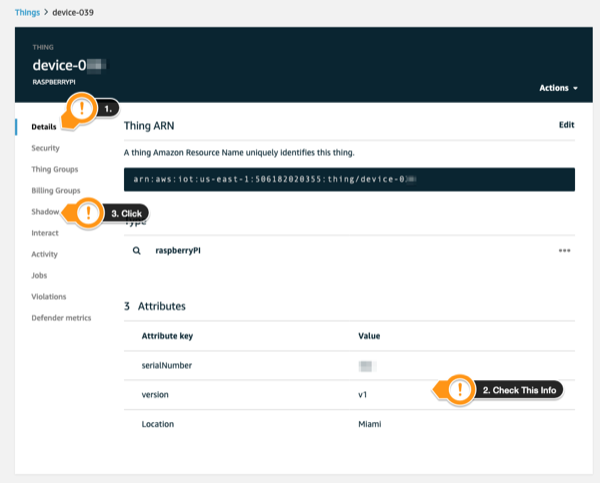
 Under the thing detail page:
 - Click Details
- Check its Attributes (Remember that your choosen thing might differ from the screenshot)
- Notice the serial number
- Notice the version
- Notice the Location
- You are going to use this info to add to the right thing group
- These are static information added on thing creation time
- Click Shadow
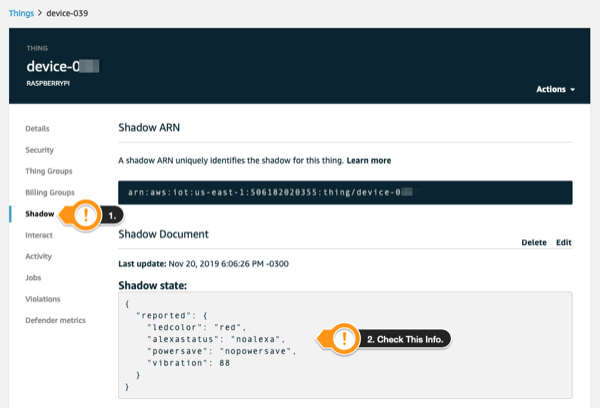
 Under the shadow detail page:
 - Notice the dynamic thing information
- Notice led color
- Notice alexa integration status
- Notice powersave mode status
- Notice vibration measures
 Leave the AWS IoT console open in this browser tab. You are going to use it in the rest of the lab.
Open the Fleet Dashboard
A web application to visually monitor your fleet has been provided. Let´s open it:
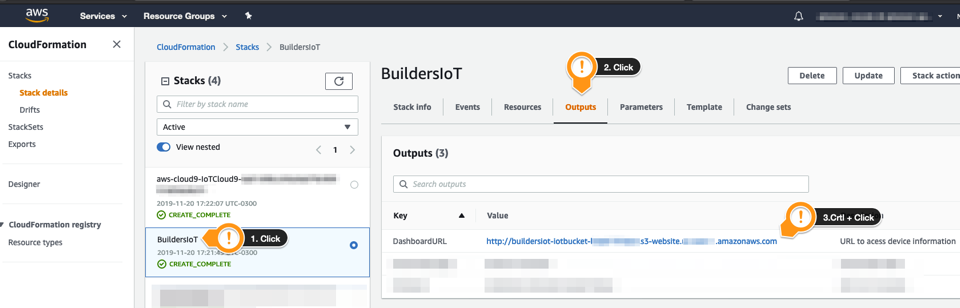
Open the AWS Cloudformation console in a new browser tab:
- Click Services on the upper left section of the console
- Type
cloudformationon the Find Services field - Click on Cloudformation result

- Click BuildersIoT Stack
- Click Outputs Tab
- Crtl + Click DashboardURL link, to open it in another browser tab
- You should see this screen (Devices and its locations might differ from your dashboard):
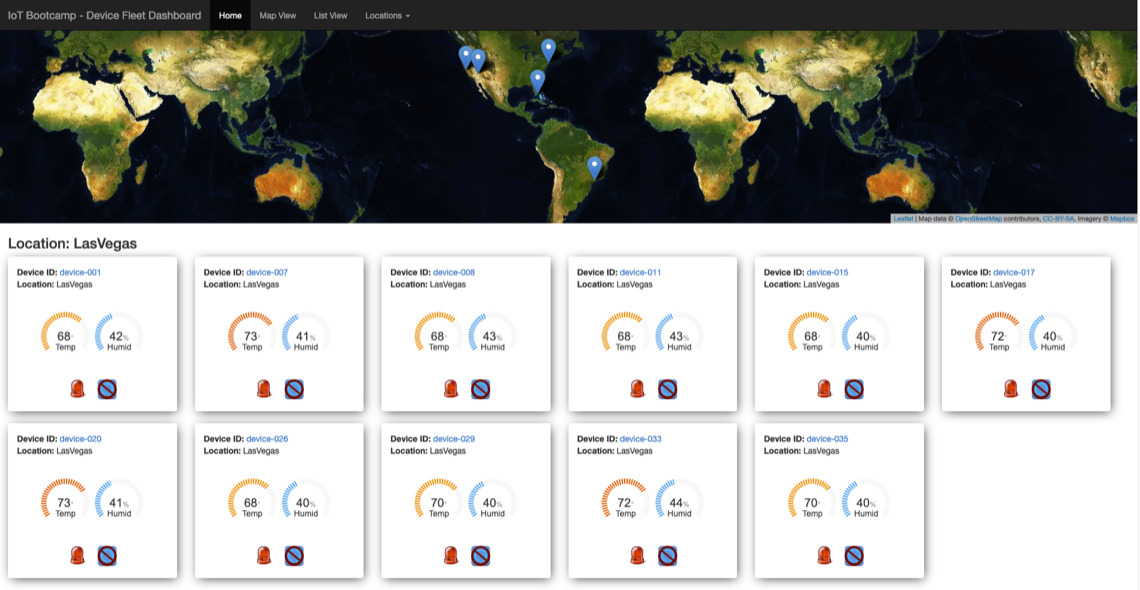
Leave the Fleet Dashboard tab open. You will use for the entire hands-on lab. You can move to the next section.