OTA updates with IoT Jobs

Remotely Managing and Customizing Devices
The smart air conditioner is becoming a huge success. Your company is deploying smart A/Cs in South America, starting in Sao Paulo, Brazil.
As part of IoT Ops, you will manage devices globally and you will implement a change on the behavior of sensors to display the temperature in Celsius degrees, which is the temperature scale used in South America.
The development team already thought about this requirement and embedded the functionality in the sensor firmware. Your main challenge will be to deploy this new behavior at scale remotely, without compromising the device and losing connectivity.
To accomplish this task in a repeatable, reliable, controlled and auditable way, you will use AWS IoT Jobs. With AWS IoT Jobs, you can send remote actions to devices, such as software updates, reboots, factory resets, and security patches, etc.
To create a job, you must first create a job document that is a description of the remote operations to be performed by the devices. For the purpose of this lab, we are going to use the following job document, which has been uploaded to a S3 bucket:
{
    "tempUnit":"celsius",
    "ledColor":"green"
}
At first, this looks like a simple document, but your Python code inside the virtual device is expecting it in the following piece of code (code is redacted for example purposes):
...
def executeJob(self, execution):
        logger.debug('Executing job ID, version, number: {}, {}, {}'.format(execution['jobId'], execution['versionNumber'], execution['executionNumber']))
        logger.debug('With jobDocument: ' + json.dumps(execution['jobDocument']))
        try:
            global temp_unit

            #code omitted (...)

            temp_unit = execution['jobDocument']['tempUnit']
            shadowCallbackContainer_Bot.sendUpdate(execution['jobDocument']['ledColor'])

            return True
        except:
            return False
...
The Python code is subscribed to the job topics and can access all the information from the job document that is being executed through the JSON['jobDocument'] element.
In this case, the device is changing a global variable to convert the temperature to celsius and update the shadow document with the new LED color state.
# Check global var to identify if the job already run
...
    if temp_unit != "celsius":
        temp = (1.8 * temp) + 32

    payload = {
        'temp': round(temp, 2),
        'humid': humid
    }
...
Creating a Job
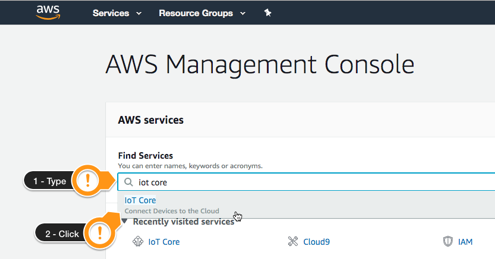
Open the AWS IoT Console, if it is not already opened:
-
Type
iot coreon the Find Services -
Click on IoT Core result
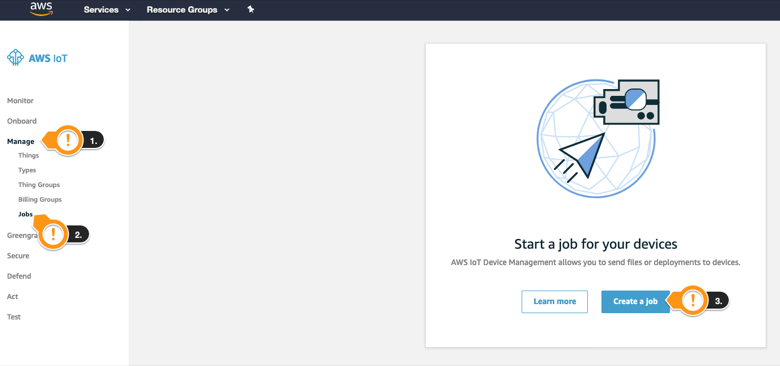
Under the IoT Home page, on the left menu:
-
Click Manage
-
Click Jobs
-
Click Create a job
-
Click Create custom job
-
Type
ChangeTempUnitas Job ID -
Type
My test jobas description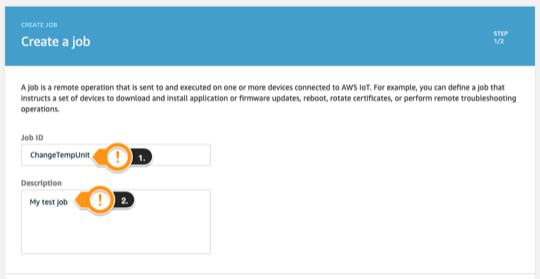
-
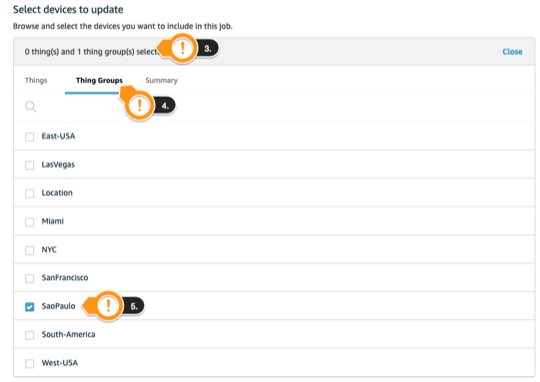
On Select devices to update, click select
-
Click Thing Groups
-
Select SaoPaulo group
-
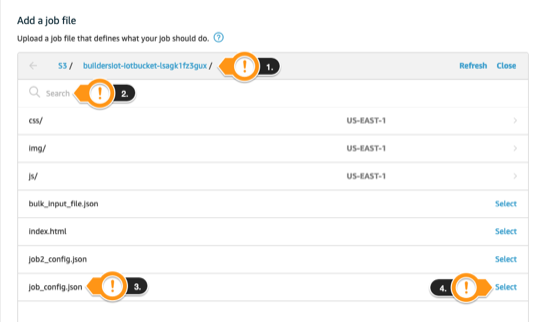
On Add job file, click Select
-
Type
iotbucketon the filter -
Select
<Stack>-iotbucket-<HASH>.- Remember to select the bucket on your region
-
Clear the
iotbucketfilter -
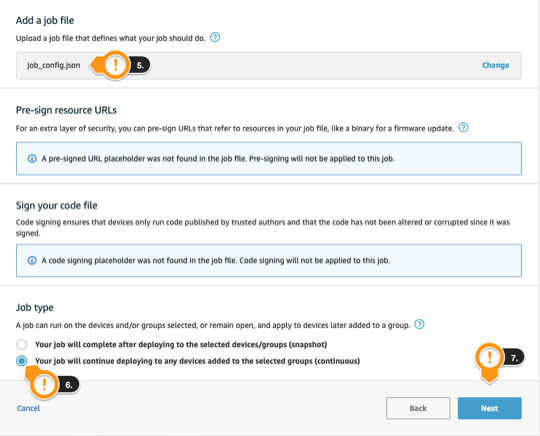
Select job_config.json
-
On Job type select CONTINUOUS option
-
Click Next
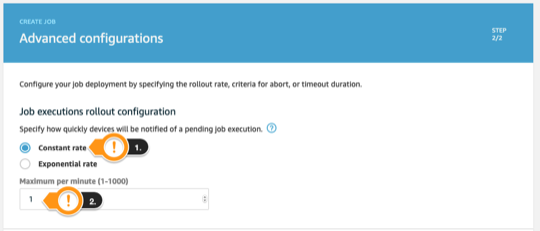
-
Accept constant rate
-
Type
1as Maximum per minute -
Accept the defaults for the other fields
-
Click Create

Monitoring the job execution
Still on AWS IoT Jobs console:
-
Click the created ChangeTempUnit job
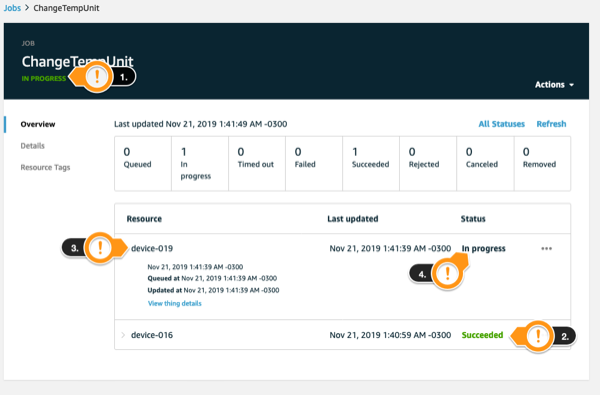
This is the overview execution of the Job. Note that you can see the summary of how many things are queued to execute the job, how many already succeeded, and failed, etc.
-
Notice that as this job is CONTINUOUS, i.e., it will always have IN_PROGRESS status as it will run for every thing that joins the group in the future.
-
Every device related to the
SaoPaulogroup was QUEUED to run the job created. The job will follow the concurrency constraints defined by themaximumPerMinuteparameter and will execute on each target inside theSaoPaulogroup. -
Click one of the devices from the Job console (e.g. device-022)
-
Notice the information about the job creation and its status
-
Click refresh a couple times to see the other devices executing the job
Monitoring the job execution using device dashboard
You can use the Fleet Dashboard to get an overview of your current fleet and see the devices provisioned on your account.
-
Open the Fleet Dashboard tab opened previously.
After opening the Fleet Dashboard, you see all the current devices provisioned on your account.
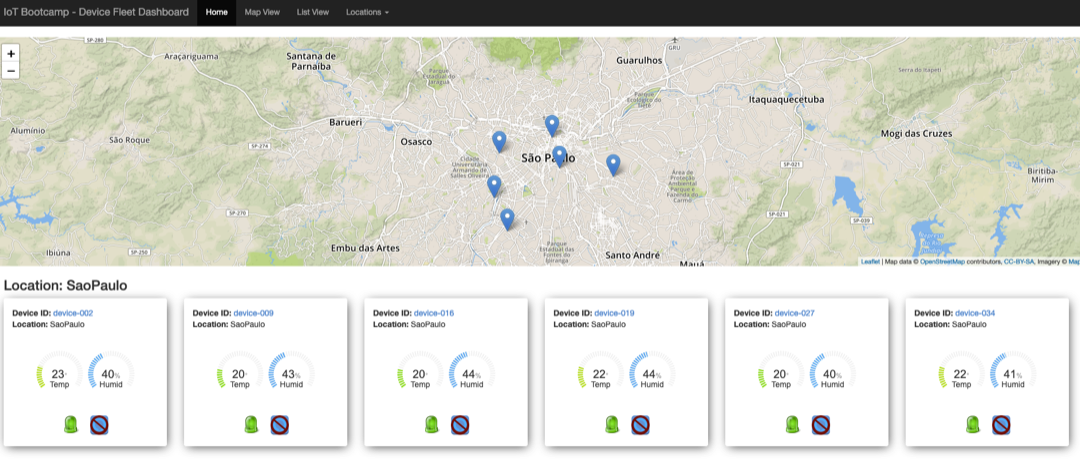
Find the devices under de
SaoPaulolocation, which executed your job and check if the LED icon changed from this: to this:

Notice that while the job is running on each device, the LED will change to blue.
Additionally, after receiving messages from the SaoPaulo devices, you should notice that the temperature now had changed to Celsius degrees!
Conclusion
Congratulations! You have run successfully a job and monitored its execution until its completion. You can move to the last section.