Managing the Registry

In this exercise, you are going to use the thing groups functionality in the IoT Registry to manage several things at once. You can use this functionality to categorize things into groups, create a hierarchy of groups, and attach a policy to a group to change permissions and behavior of its things all at once.
You will walk through a solution which has the following tasks:
- Configure Thing Groups
- Configure Thing Groups Hierarchy
- Configure IoT Fleet Indexing
- Add Things to its respective groups
You should only use the architecture and sample code displayed below as a guideline.
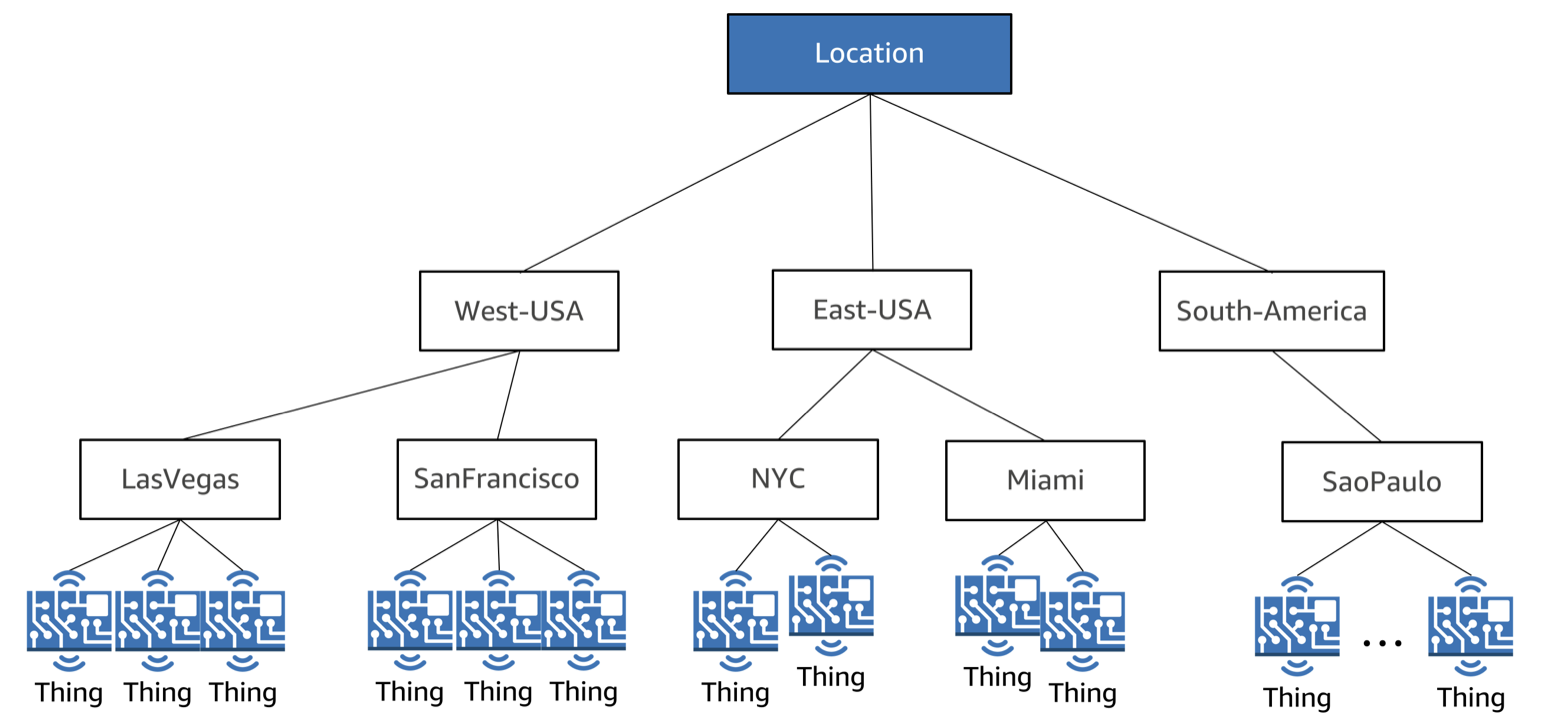
Your smart air conditioners are getting online all over the world as you could see in the last section. To improve the way you manage things at scale, you will organize them in a layered hierarchical structure. The Location group should be at the root level.
The diagram below shows the hierarchical organization after creating all the groups in this exercise.
For the following tasks, you will use both the AWS Console and AWS CLI to execute commands and procedures. First, you will organize your things into groups.
Creating Thing Groups
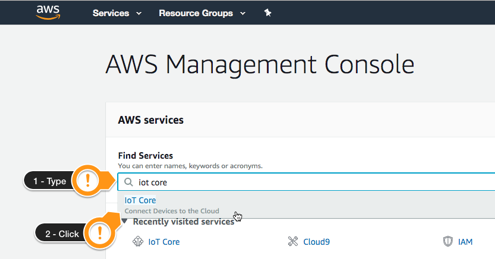
Open the AWS IoT Console, if it is not already opened:
- Type
iot coreon the Find Services - Click on IoT Core result
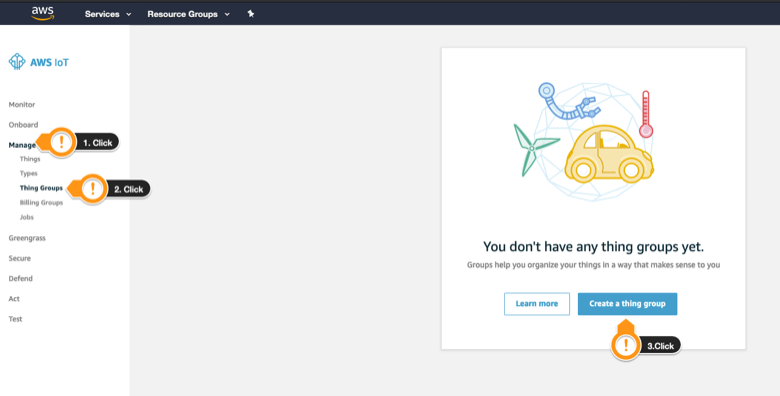
 Under the IoT Home page, on the left menu:
 - Click Manage
- Click Thing Groups
- Click Create a thing Group
- Click Create Thing Group
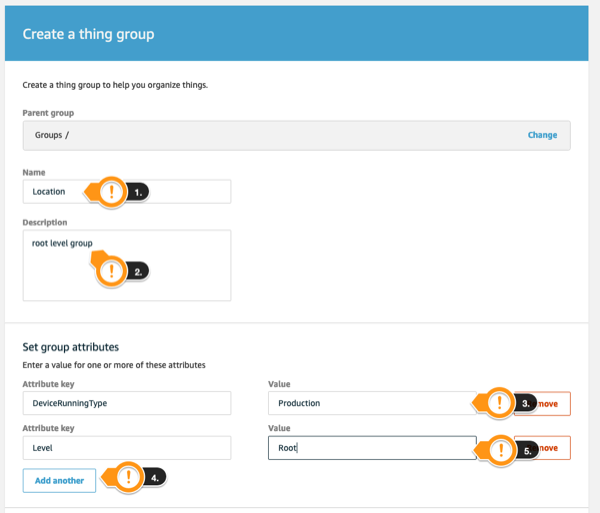
- Type
Locationas Name - Type
root level groupas Description - Under Set group attributes, type
DeviceRunningTypeas Attribute key - Type
Productionas Value - Click Add Another
- Type
Levelas Attribute key - Type
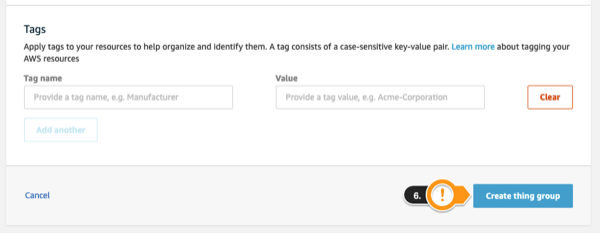
Rootas Value - Click Create thing group
Create the layers of group hierarchy
In order to speed up the other groups creation, let´s use Cloud9 and the AWS CLI commands.
You will start making children groups by creating the East-USA group. This group helps you define the first layer of specialization for your fleet and is the child of the Location group.
You will create your thing group using the create-thing-group command in the AWS CLI. The command requires parameters, similar the ones you have used in AWS console, except the group hierarchy relationship, represented by the --parent-group-name parameter.
Go back to the Cloud9 tab opened previously:
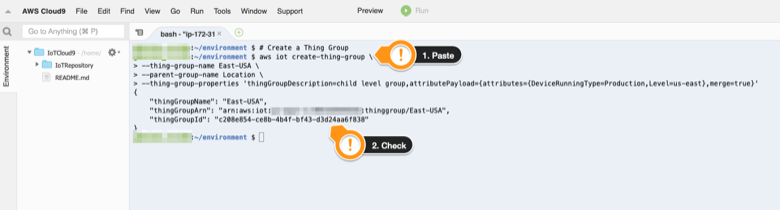
- Copy and paste the command is below into the Cloud9 terminal:
# Create a Thing Group
aws iot create-thing-group \
    --thing-group-name East-USA \
    --parent-group-name Location \
    --thing-group-properties 'thingGroupDescription=child level group,attributePayload={attributes={DeviceRunningType=Production,Level=us-east},merge=true}'
- Hit enter
If the command executes successfully, the output will look like this:
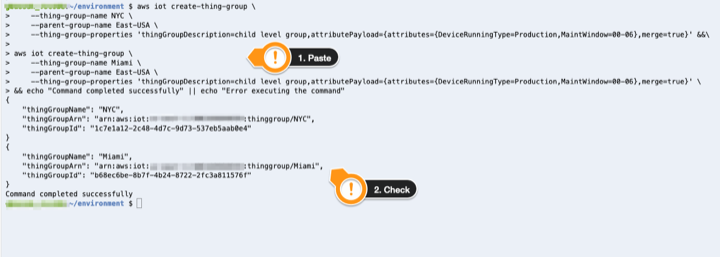
 Next, create two child groups: East-USA group, NYC and Miami respectively. Concatenate the two commands together to improve speed:
 - Copy and paste the command is below into the Cloud9 terminal:
# Create a Thing Groups aws iot create-thing-group \ --thing-group-name NYC \ --parent-group-name East-USA \ --thing-group-properties 'thingGroupDescription=child level group,attributePayload={attributes={DeviceRunningType=Production,MaintWindow=00-06},merge=true}' &&\ aws iot create-thing-group \ --thing-group-name Miami \ --parent-group-name East-USA \ --thing-group-properties 'thingGroupDescription=child level group,attributePayload={attributes={DeviceRunningType=Production,MaintWindow=00-06},merge=true}' \ && echo "Command completed successfully" || echo "Error executing the command" - Hit Enter
If the command executes successfully, the output will look like this:
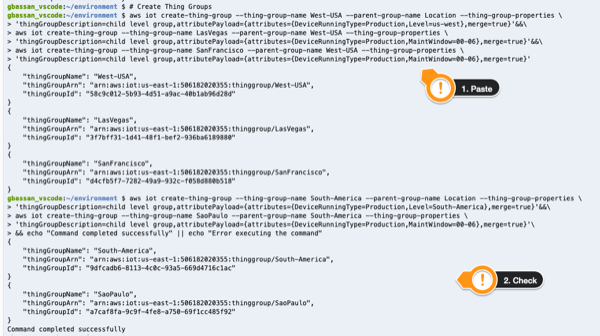
 You have created the first branch of the organization hierarchy. Now you have to define the West-USA and South-America organizations and their respective child groups. To quickly define this configuration, run the concatenated group creation command shown below. Be aware of different attributes and child relationships with higher hierarchy levels of the organization.
 - Copy and paste the command is below into the Cloud9 terminal:
# Create Thing Groups aws iot create-thing-group --thing-group-name West-USA --parent-group-name Location --thing-group-properties \ 'thingGroupDescription=child level group,attributePayload={attributes={DeviceRunningType=Production,Level=us-west},merge=true}'&&\ aws iot create-thing-group --thing-group-name LasVegas --parent-group-name West-USA --thing-group-properties \ 'thingGroupDescription=child level group,attributePayload={attributes={DeviceRunningType=Production,MaintWindow=00-06},merge=true}'&&\ aws iot create-thing-group --thing-group-name SanFrancisco --parent-group-name West-USA --thing-group-properties \ 'thingGroupDescription=child level group,attributePayload={attributes={DeviceRunningType=Production,MaintWindow=00-06},merge=true}' &&\ aws iot create-thing-group --thing-group-name South-America --parent-group-name Location --thing-group-properties \ 'thingGroupDescription=child level group,attributePayload={attributes={DeviceRunningType=Production,Level=South-America},merge=true}'&&\ aws iot create-thing-group --thing-group-name SaoPaulo --parent-group-name South-America --thing-group-properties \ 'thingGroupDescription=child level group,attributePayload={attributes={DeviceRunningType=Production,MaintWindow=00-06},merge=true}'\ && echo "Command completed successfully" || echo "Error executing the command" - Hit Enter
If the command executes successfully, the output will look like this:
Checking the Created Groups in AWS IoT Console
Use the following steps to inspect the groups in the AWS IoT console and verify that all the commands ran successfully.
Open the AWS IoT Console, if it is not already opened:
- Type
iot coreon the Find Services - Click on IoT Core result
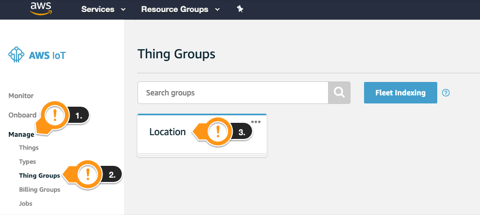
Under the IoT Home page, on the left menu:
- Click Manage
- Click Thing Groups
- Click on Location group on the canvas
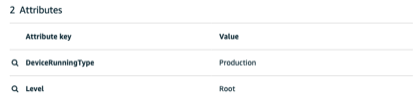
- Notice the DeviceRunningType and Level Attributes
- These attributes will extend the thing metadata and can be queried later on
- These attributes will extend the thing metadata and can be queried later on
- Notice the DeviceRunningType and Level Attributes
- Click on Groups on the left
- Notice that South-America, East-USA and West-USA are child groups of Location
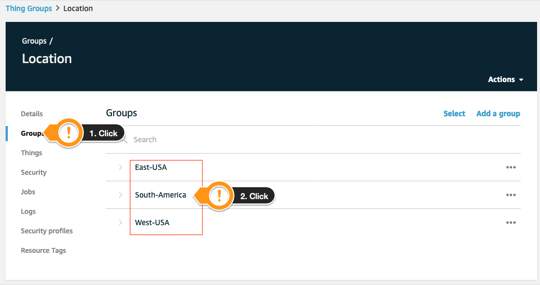
- Click South-America
- Notice the child group SaoPaulo and click it
- Click Details on the left
- Notice the different attributes from the upper levels, like MaintWindow for example

Keep in mind that everything you created so far is searchable from fleet Indexing. You are going to enable it to include the things on this organization.
Conclusion
Congratulations! You have added things to groups and organized your fleet into logical groups. You can now move to the next section.