Audit: Mitigation Actions
Hey IoT Fleet Manager, your policy mitigation strategy based on AWS IoT Device Defender and AWS Lambda successfully avoided thousands of threats that could have happened by unintended configuration on the production environment. Well done!
As the solution keeps growing, you notice operators sometimes leverage AWS IoT logging capabilities to troubleshoot issues. For example, they change the log level from ERROR to DEBUG to gather more information about a specific device that is not connecting to the device gateway. Last week, an operator completely disabled the logging by mistake, delaying the identification of a security bug that impacted a few customers in production. To avoid that, you included the Logging check to a daily Audit and test the new Mitigation actions.
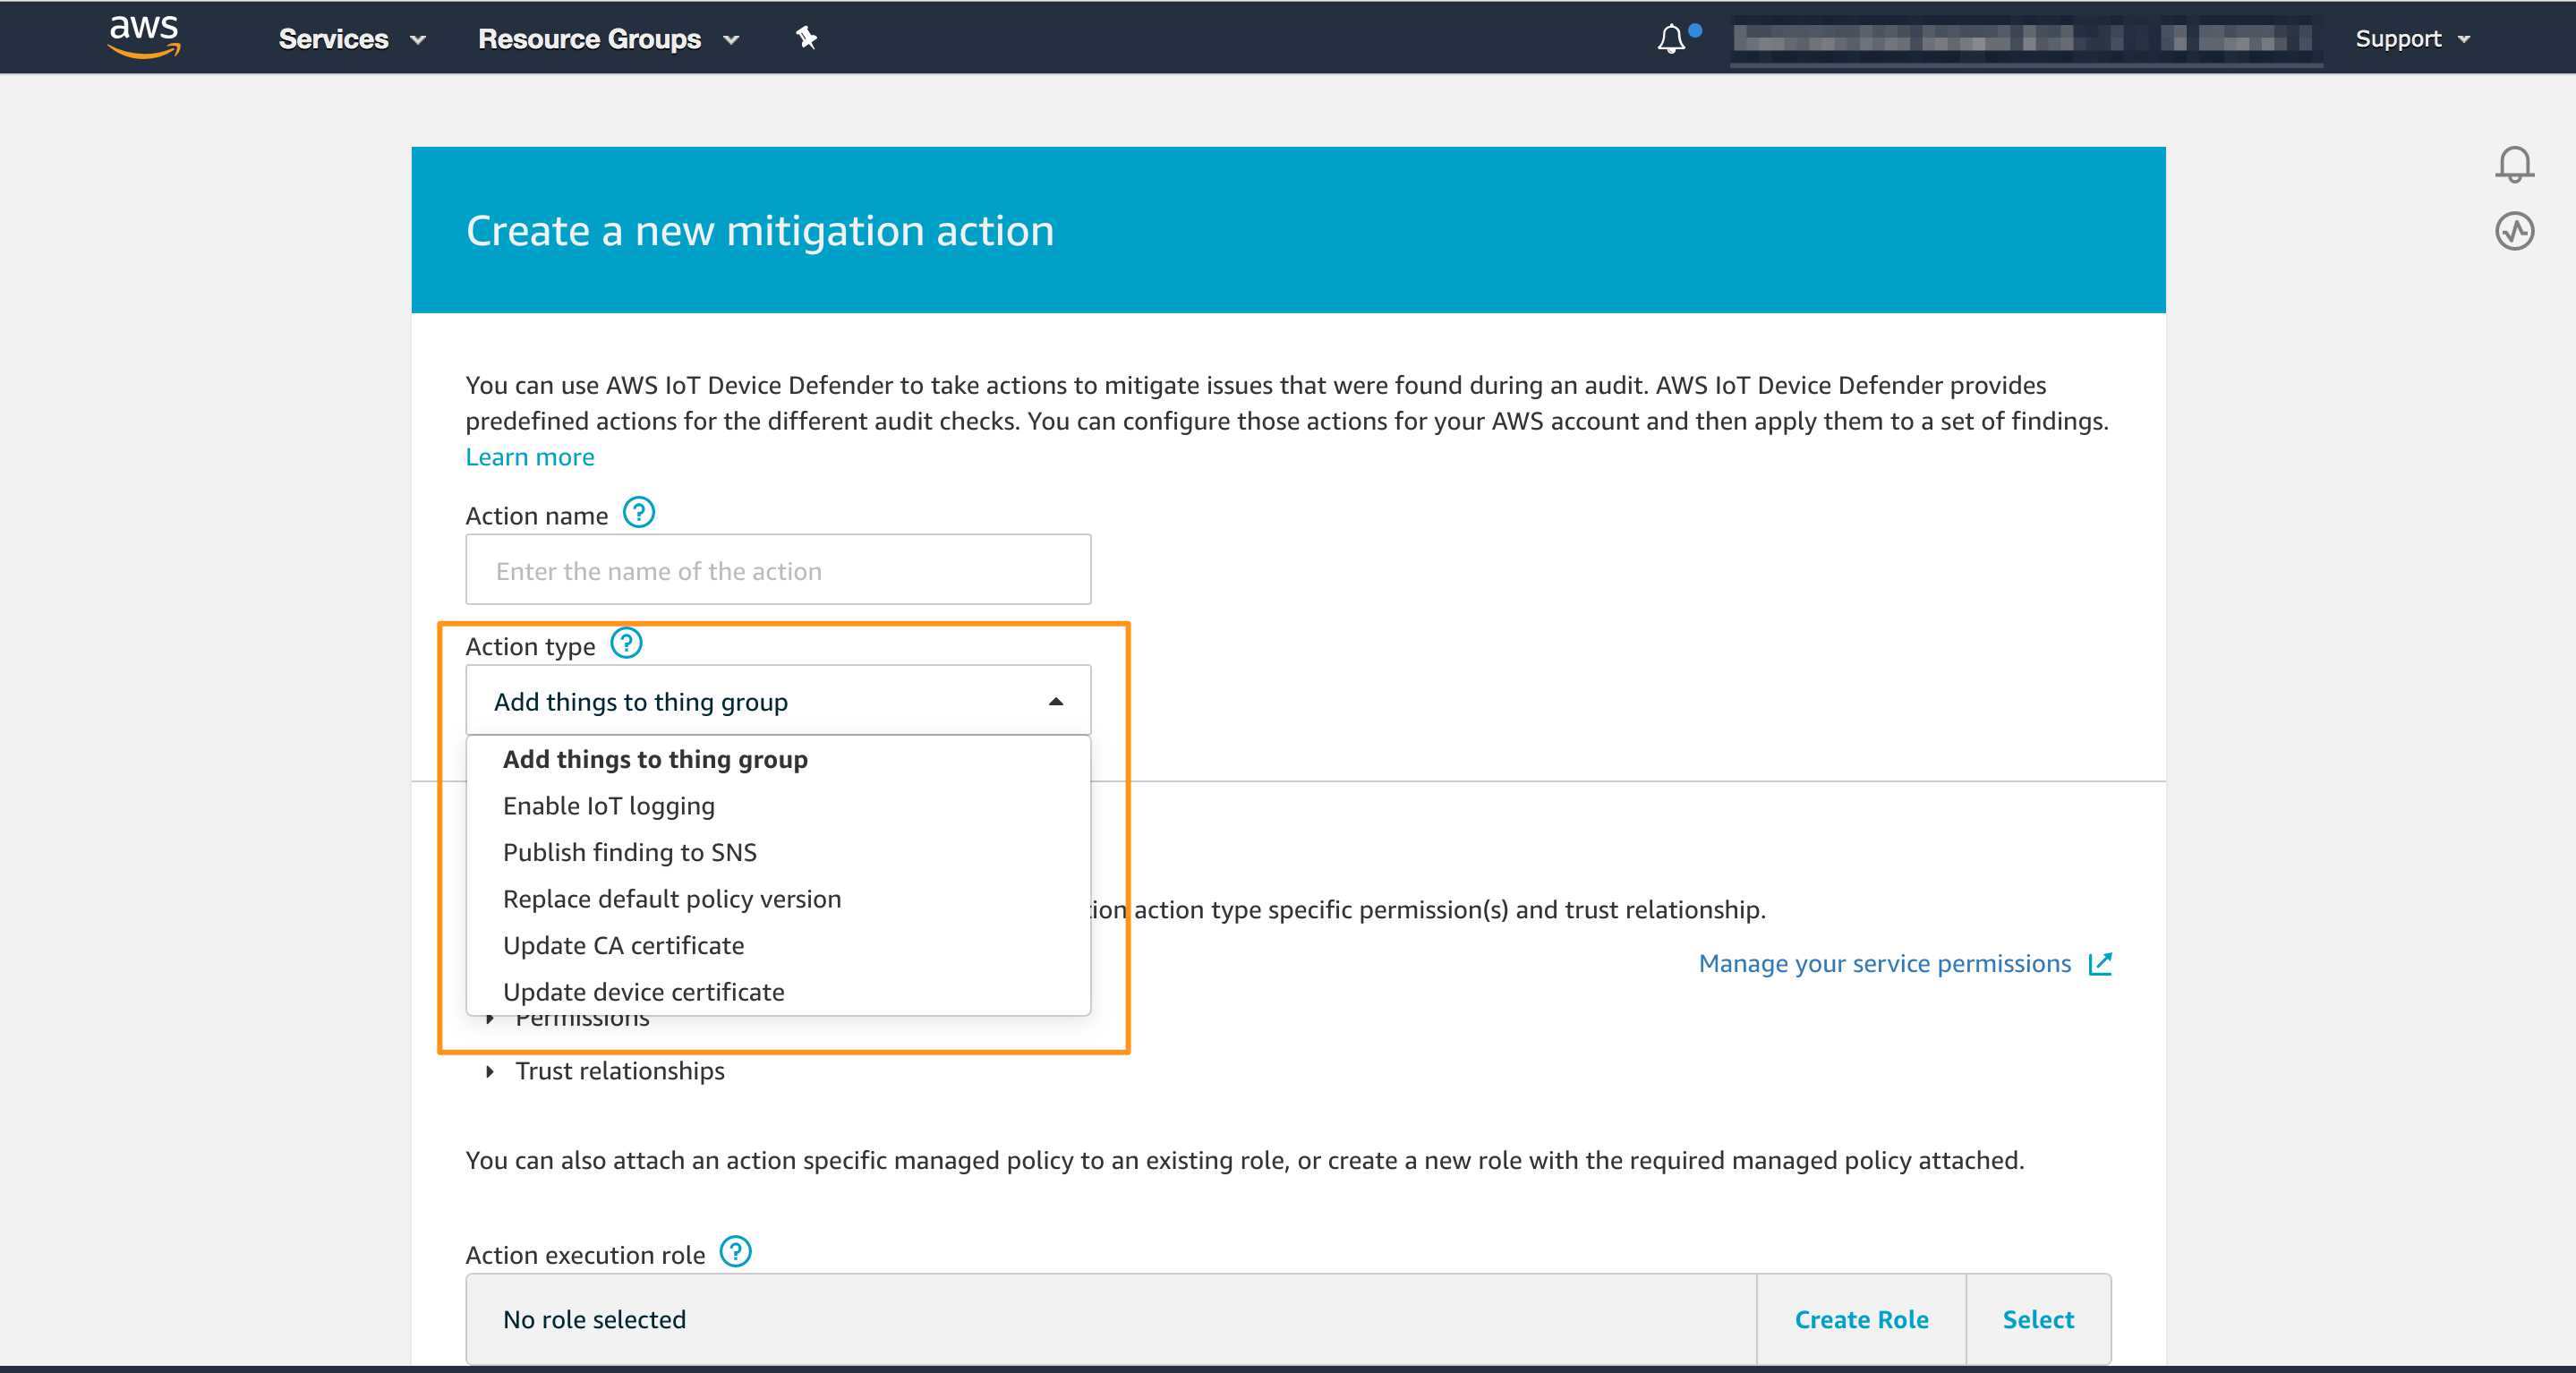
AWS IoT Defender Mitigation actions is a feature to set up and handle Findings writing no code. Although Lambda functions allow you to create very flexible remediations, Mitigation actions offers a simple way to address some common cases:
- Add Things to thing group - move the device to a specific group to restrict its policy or flag it for troubleshooting
- Enable IoT logging - enable IoT logging on the desired log level
- Publish finding to SNS - another way to forward Findings to different systems or AWS services, including AWS Lambda
- Replace default policy version - mitigate a permissive policy
- Update CA certificate - retire an expired or expiring certificate
- Update device certificate - disable a device certificate
Creating a Mitigation Action
You need to configure the Mitigation action you want to offer to your operator. You can do this following steps:
- Open the AWS IoT console
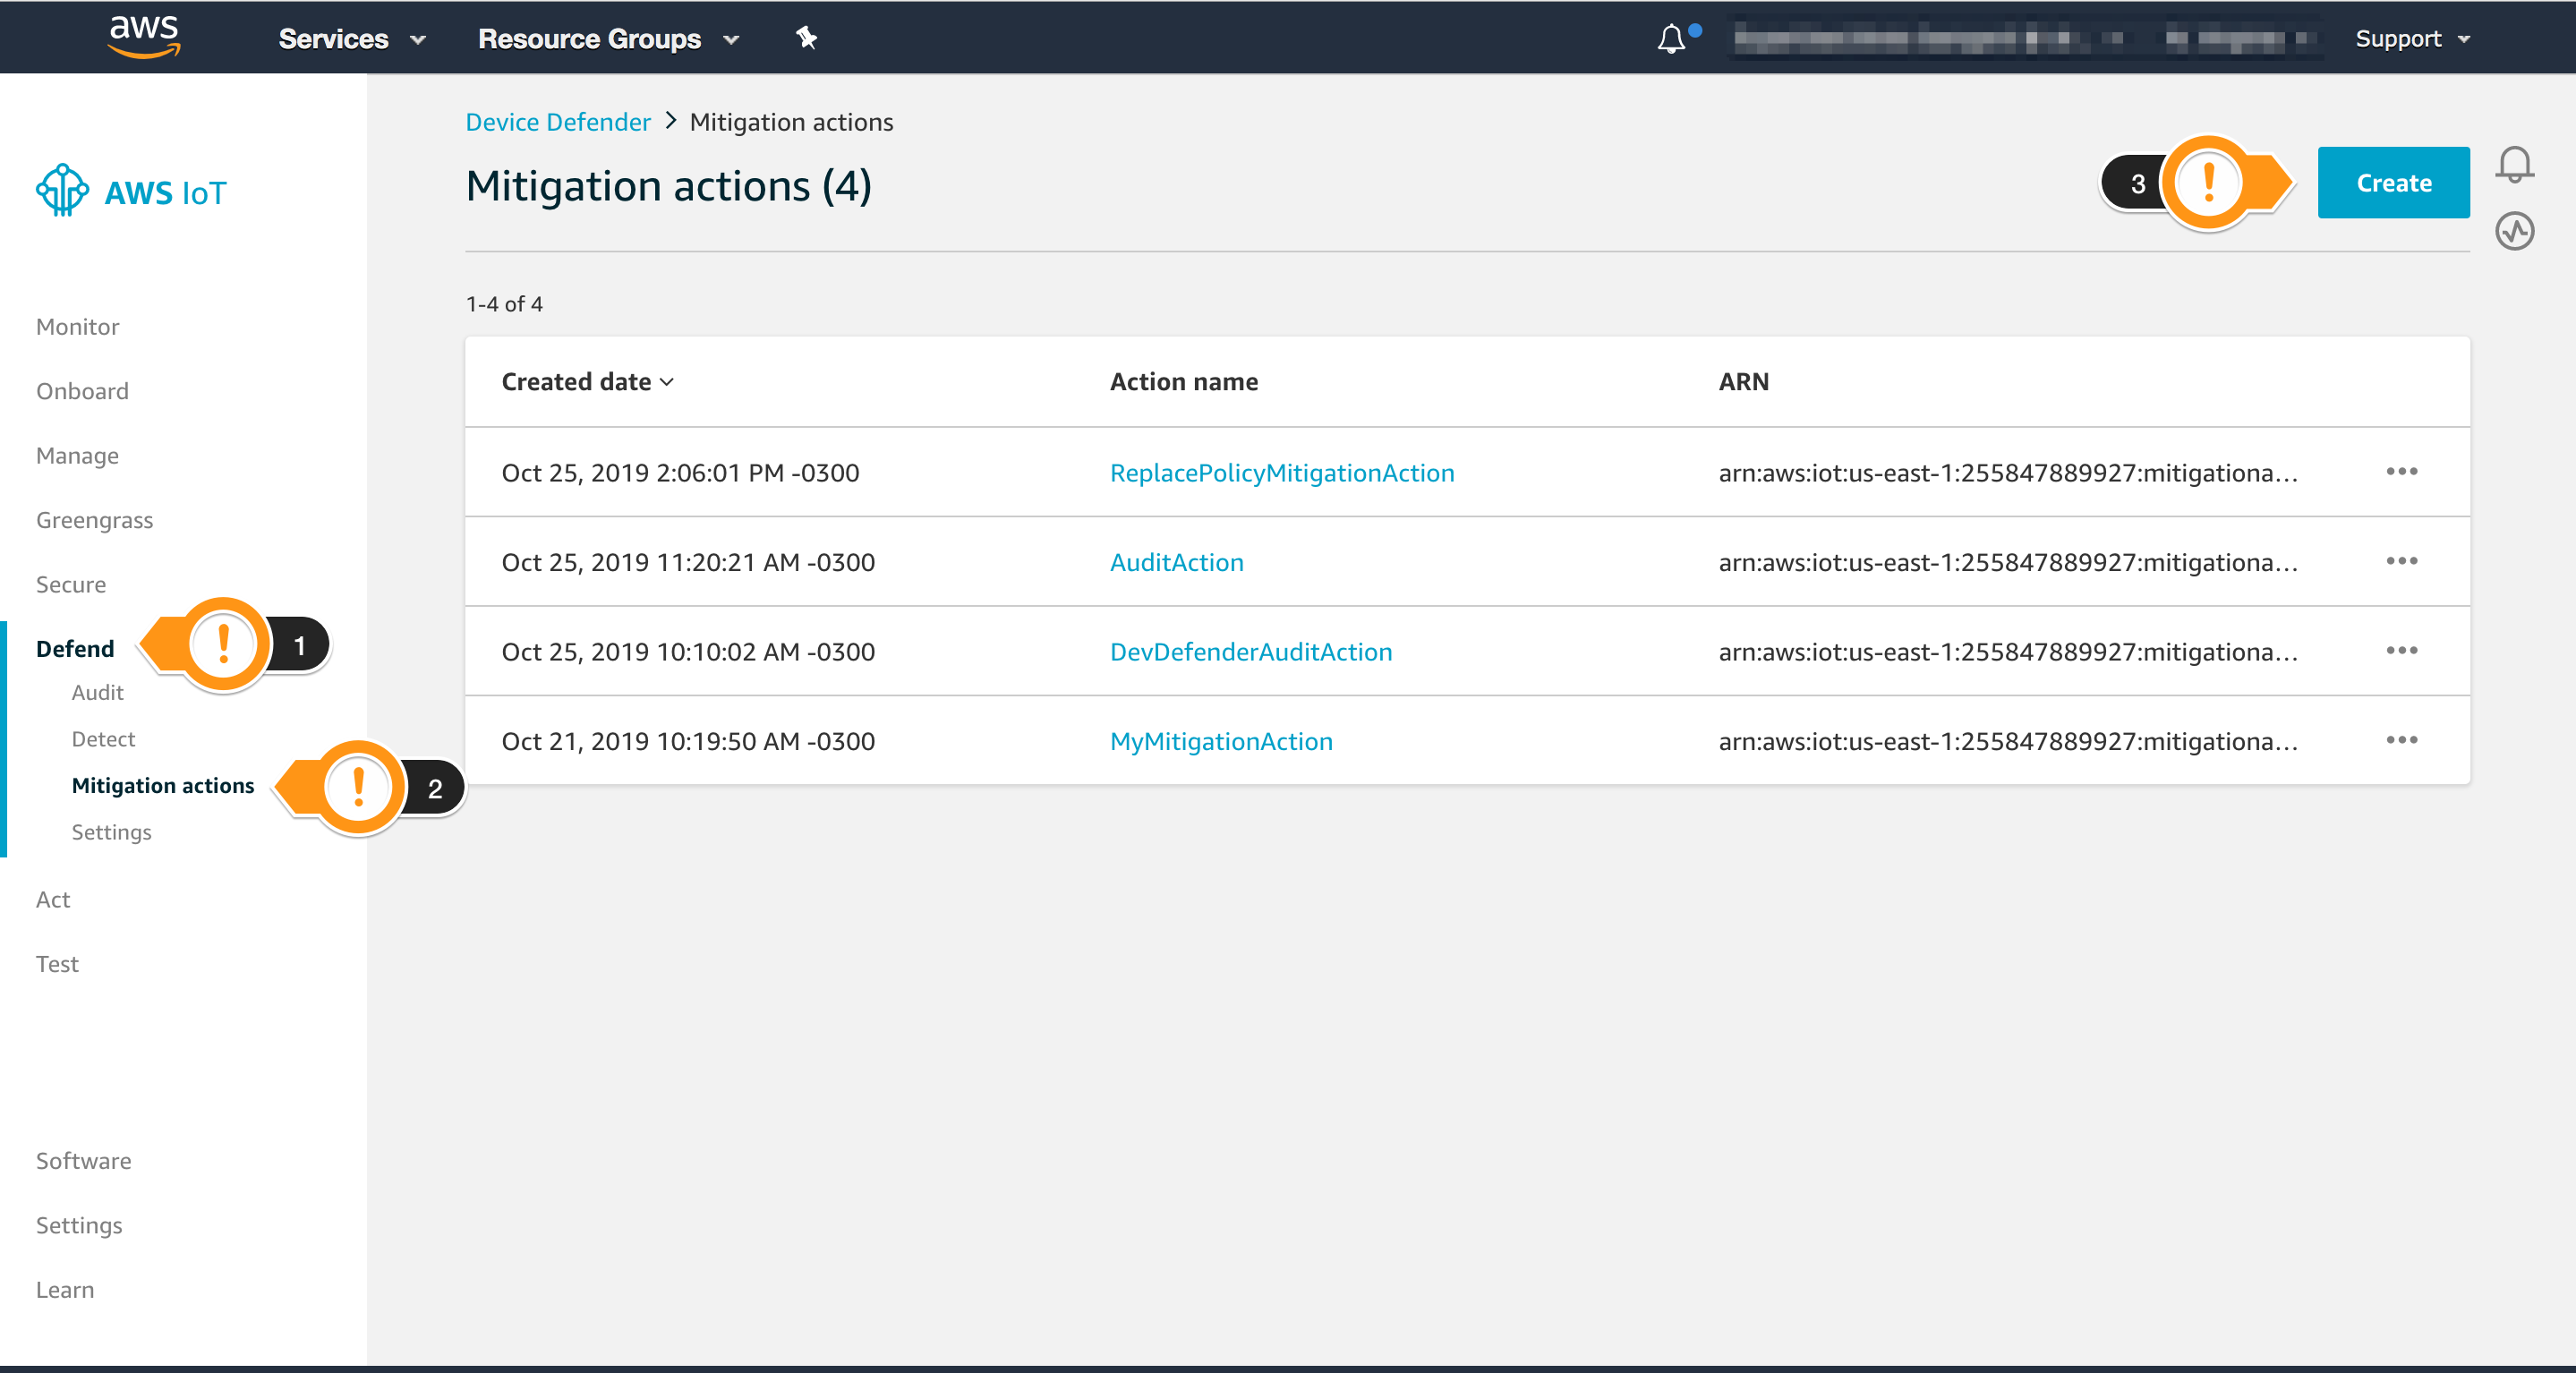
- In the left navigation pane, choose Defend, and then choose Mitigation actions
- Choose Create
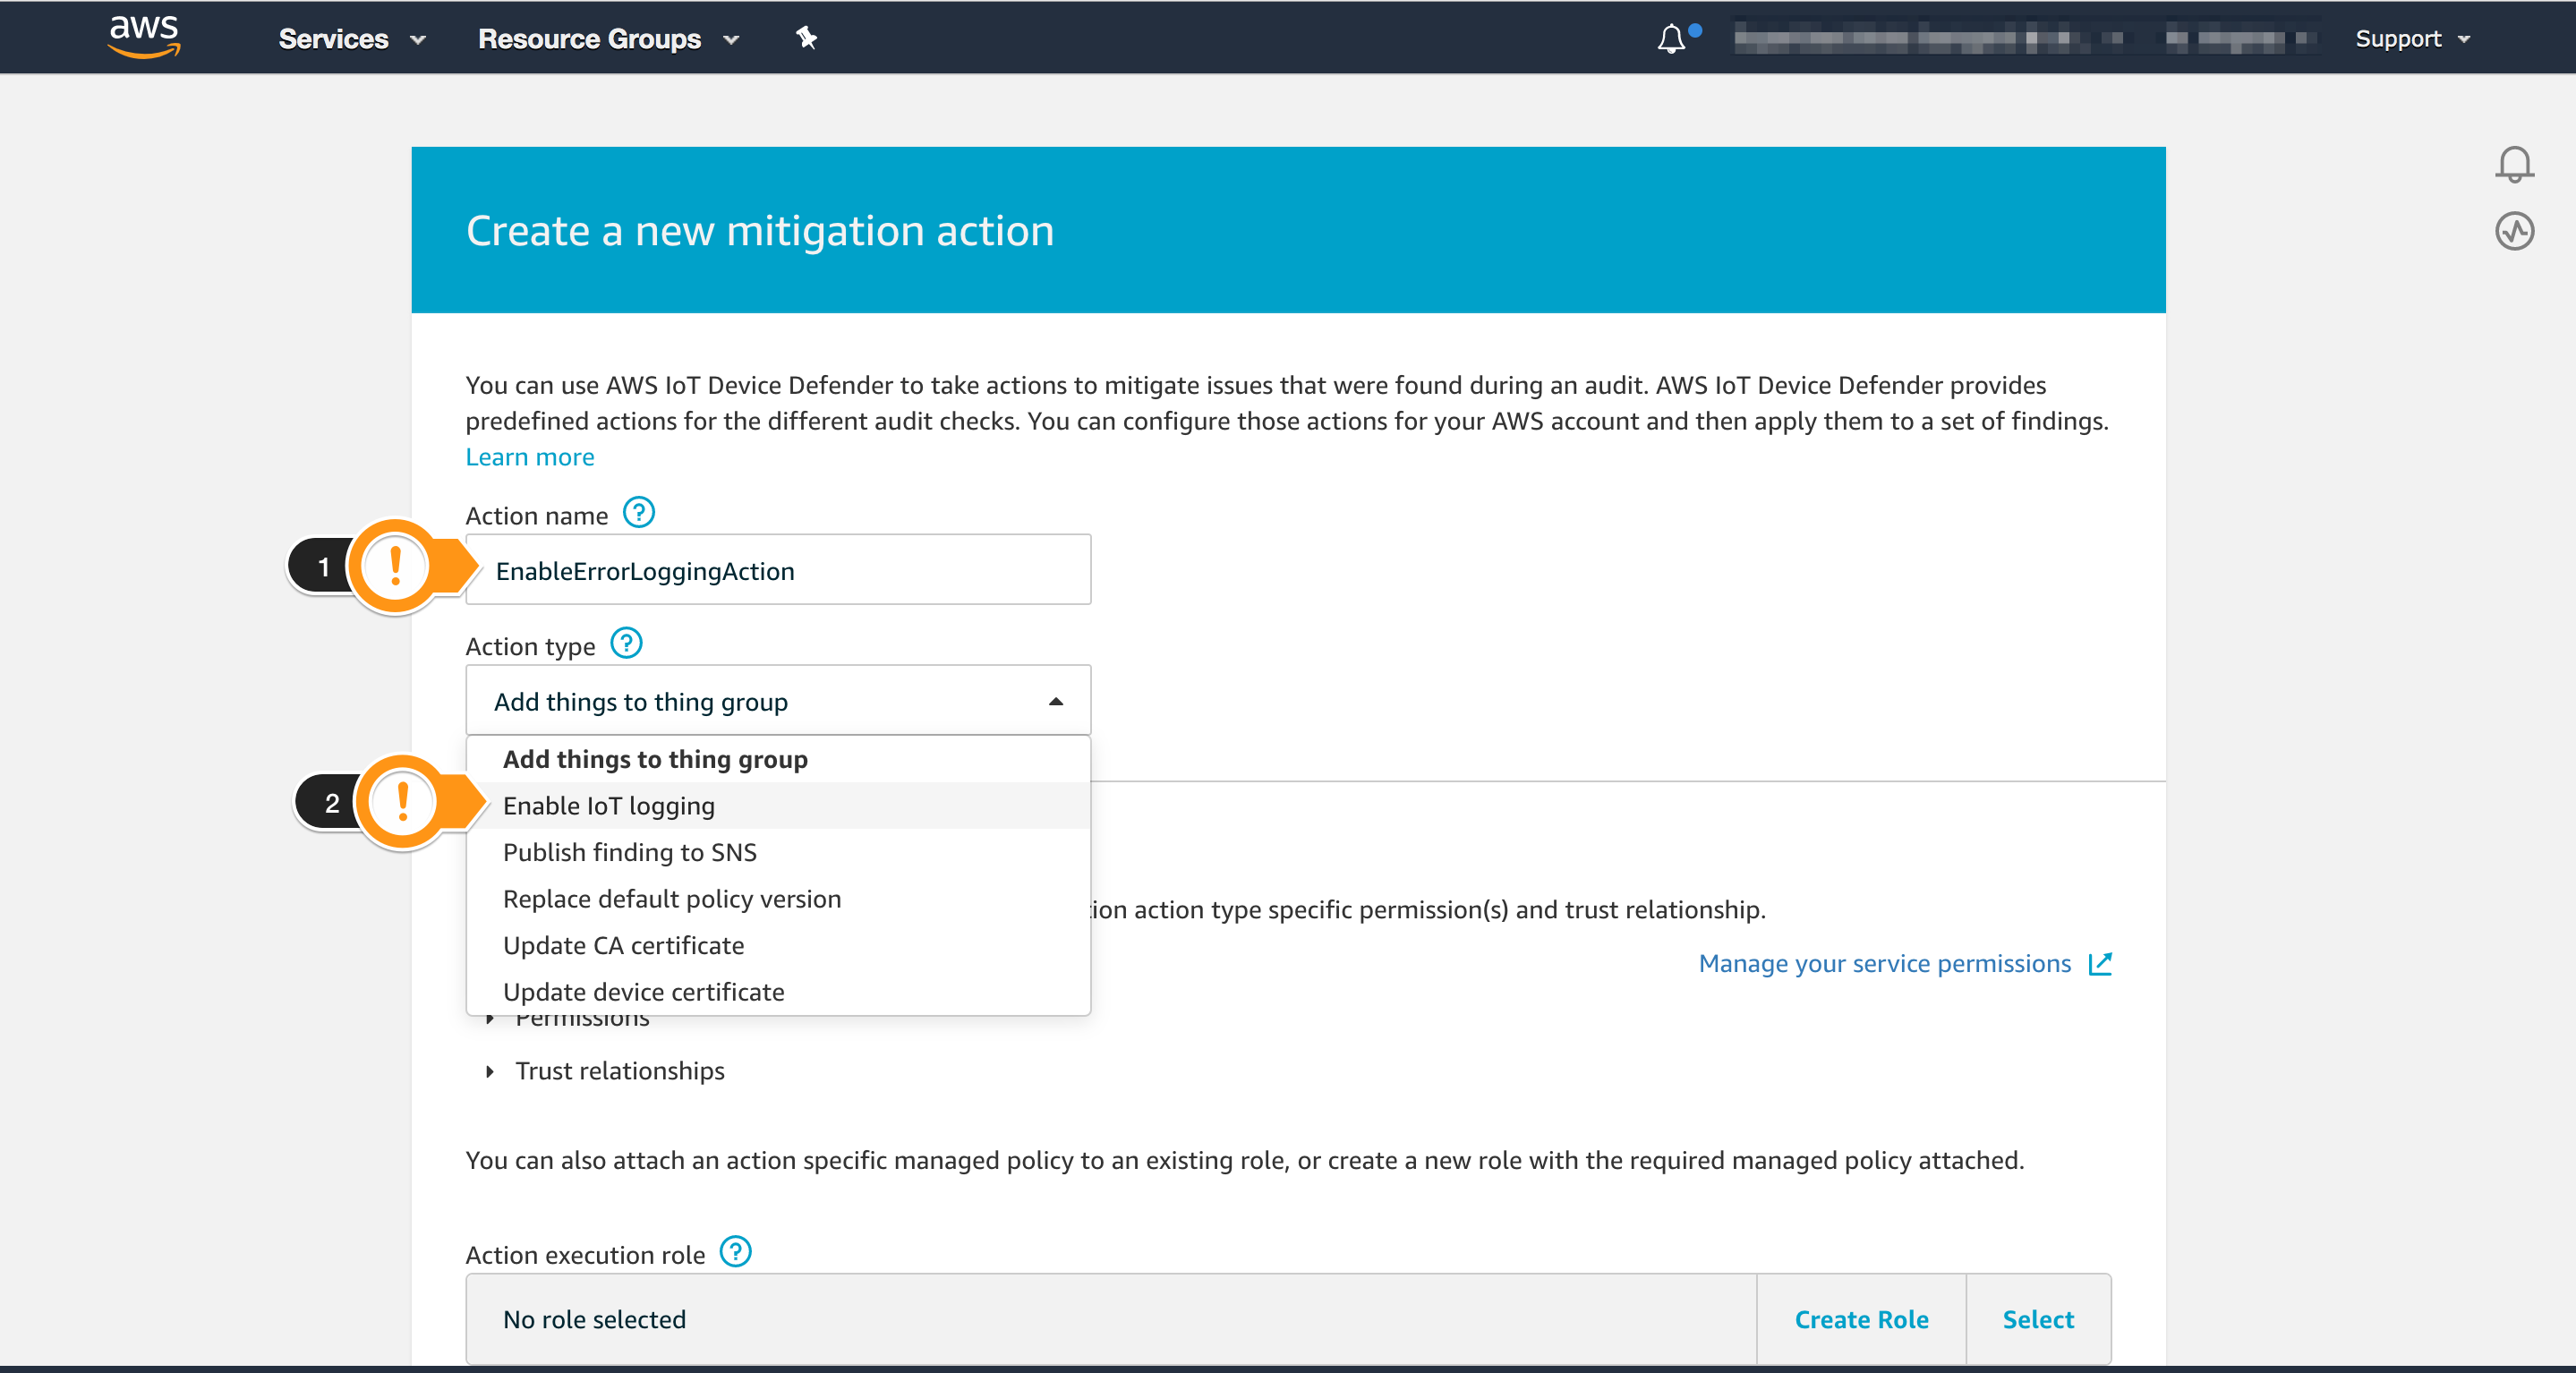
- For Name, type
EnableErrorLoggingAction - For Action type, click Enable IoT logging
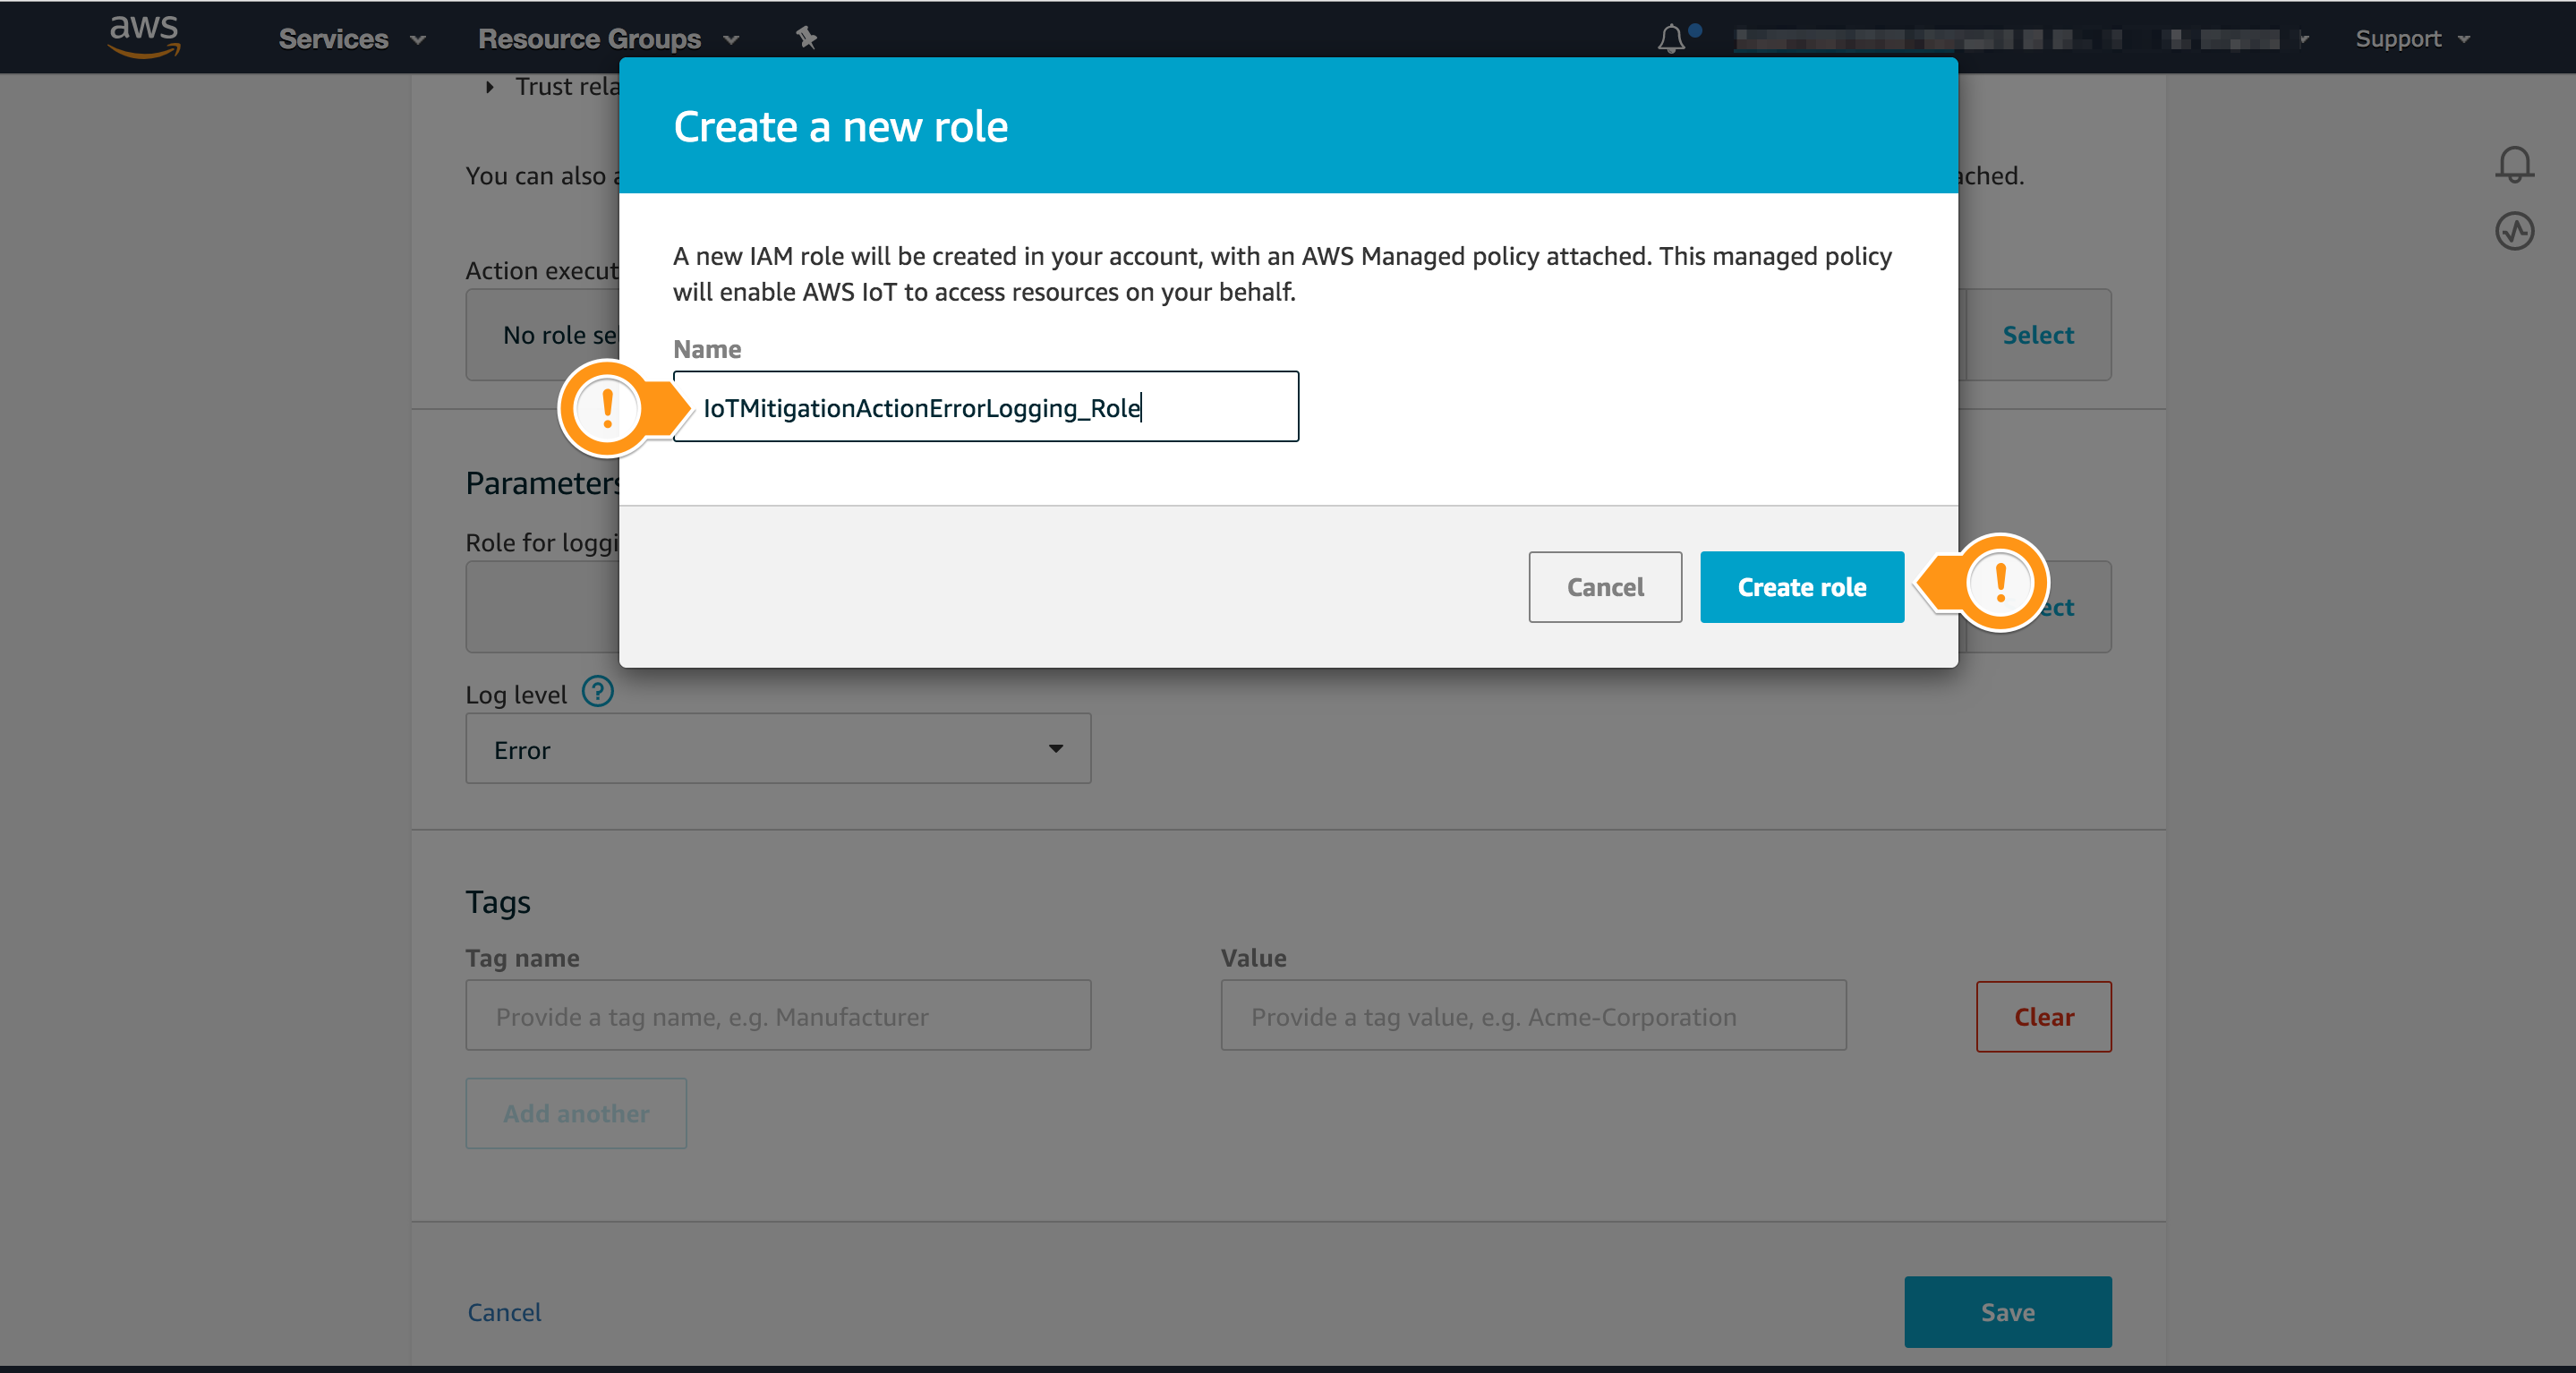
- Choose Create Role
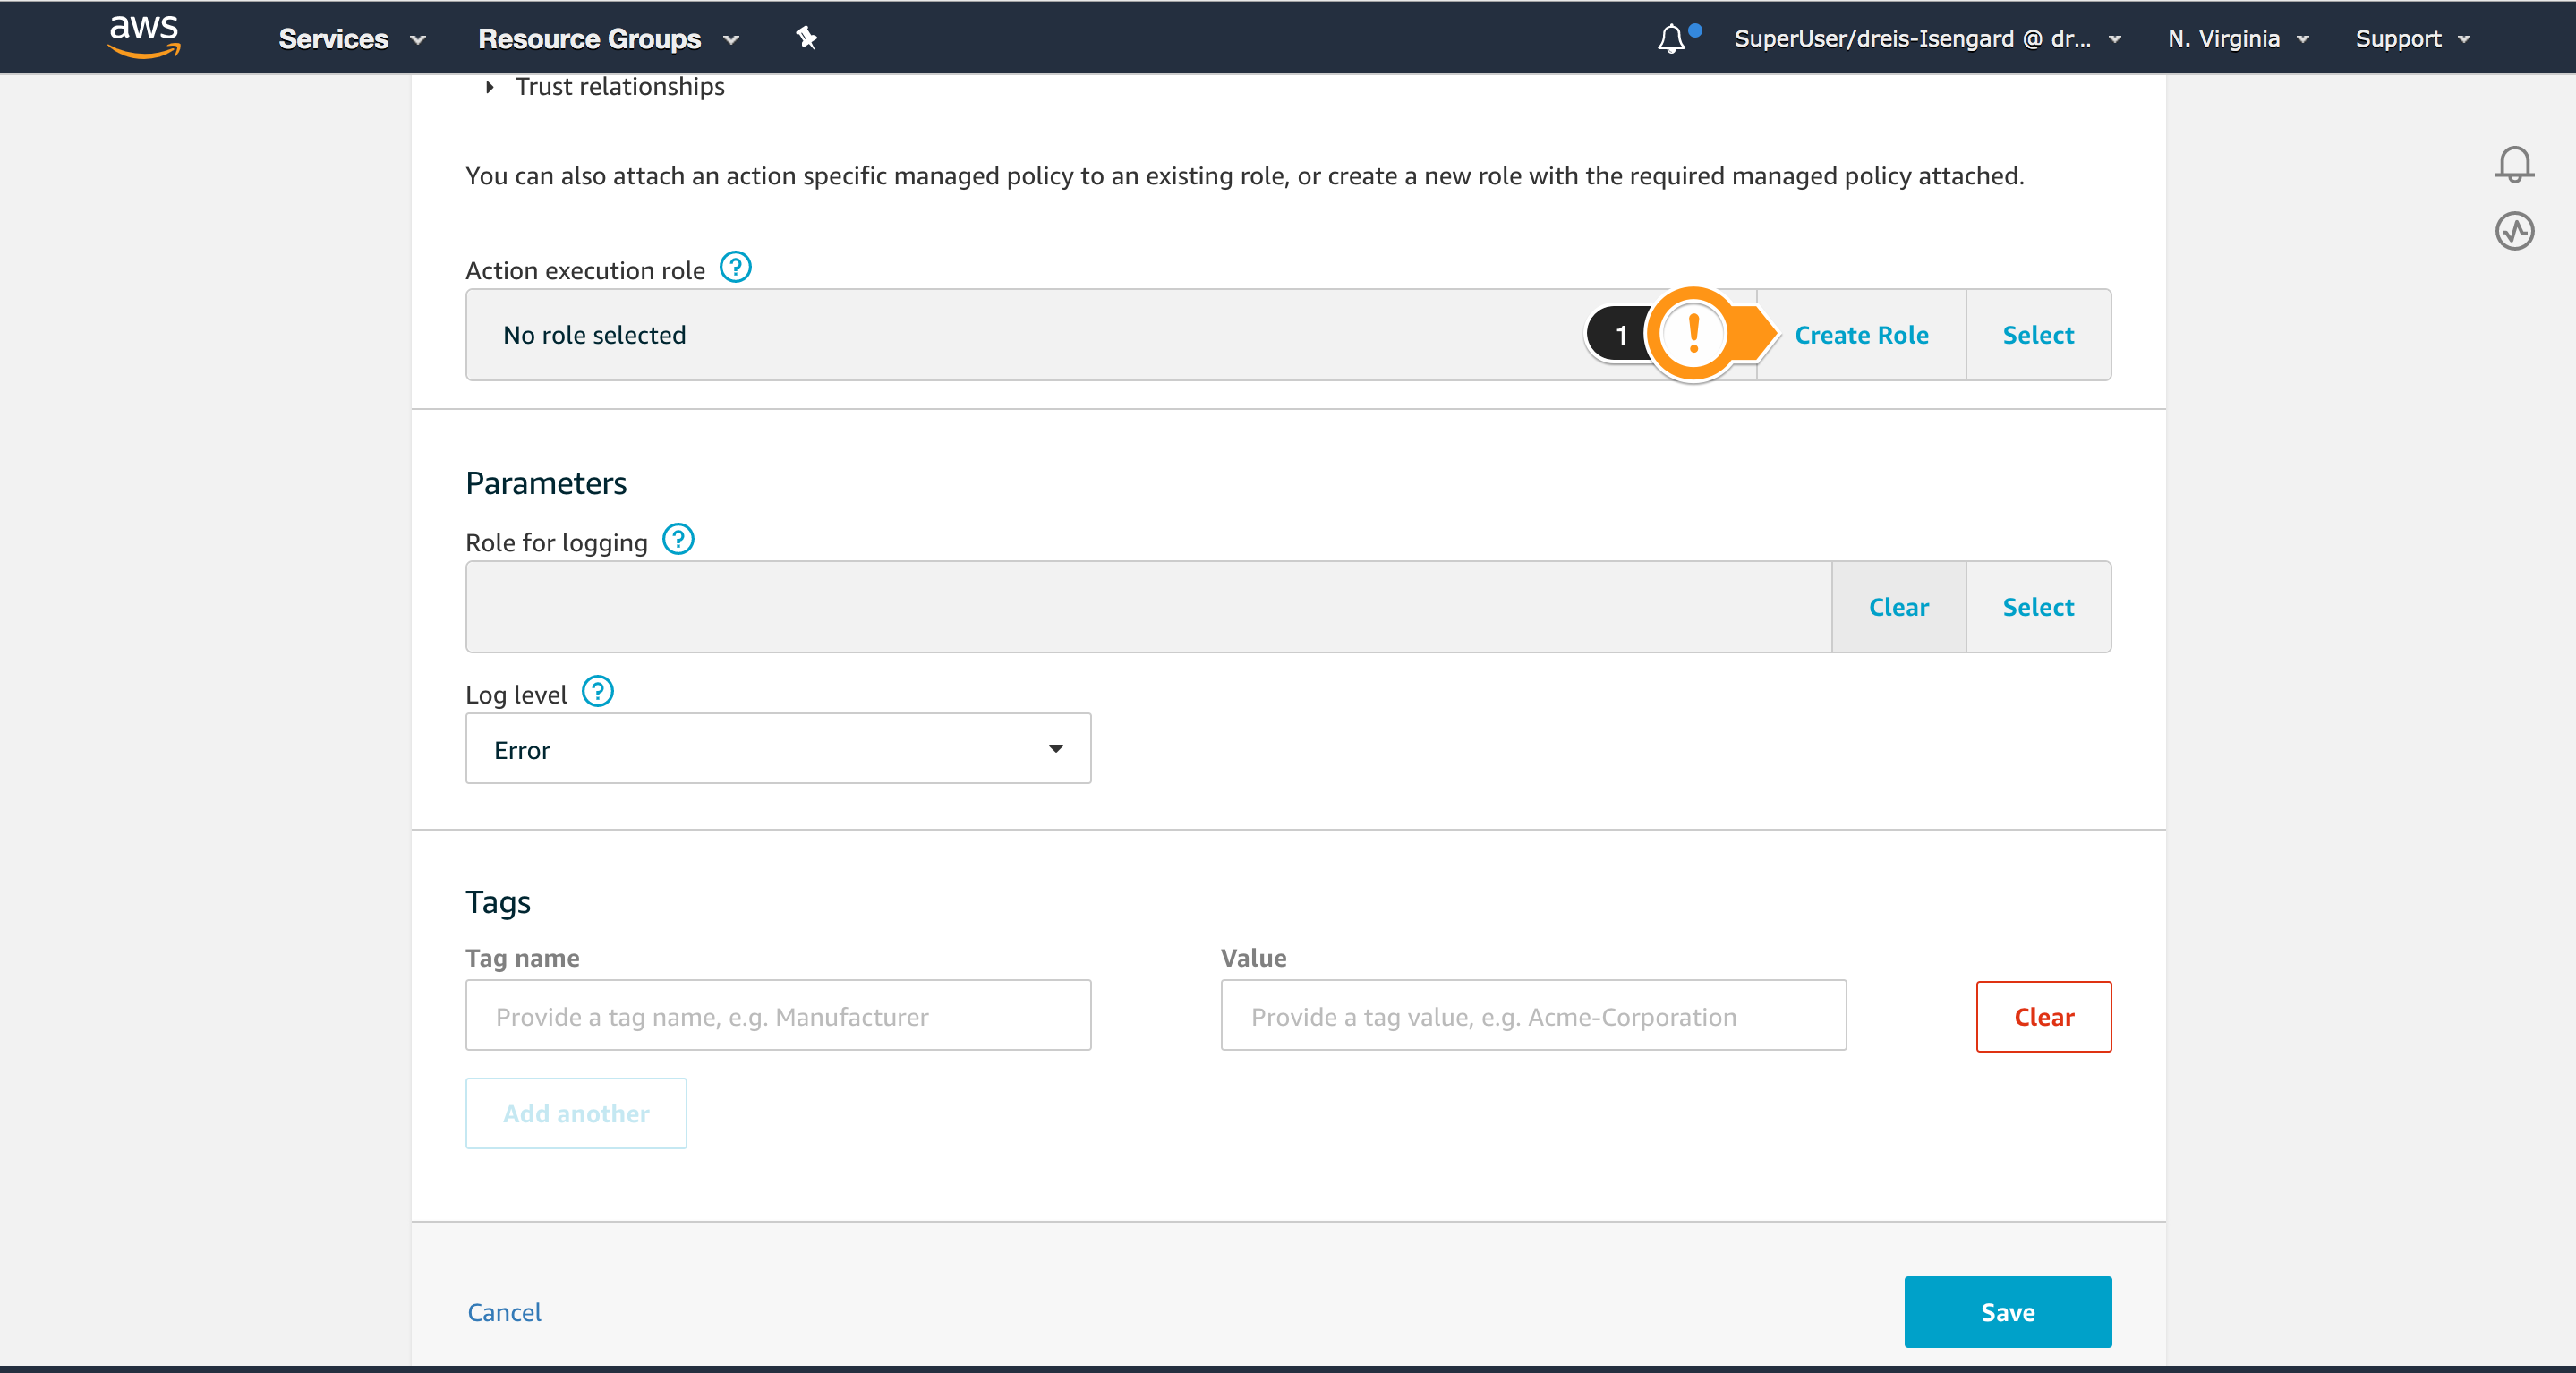
- For Name, type
IoTMitigationActionErrorLogging_Role - Choose Create role
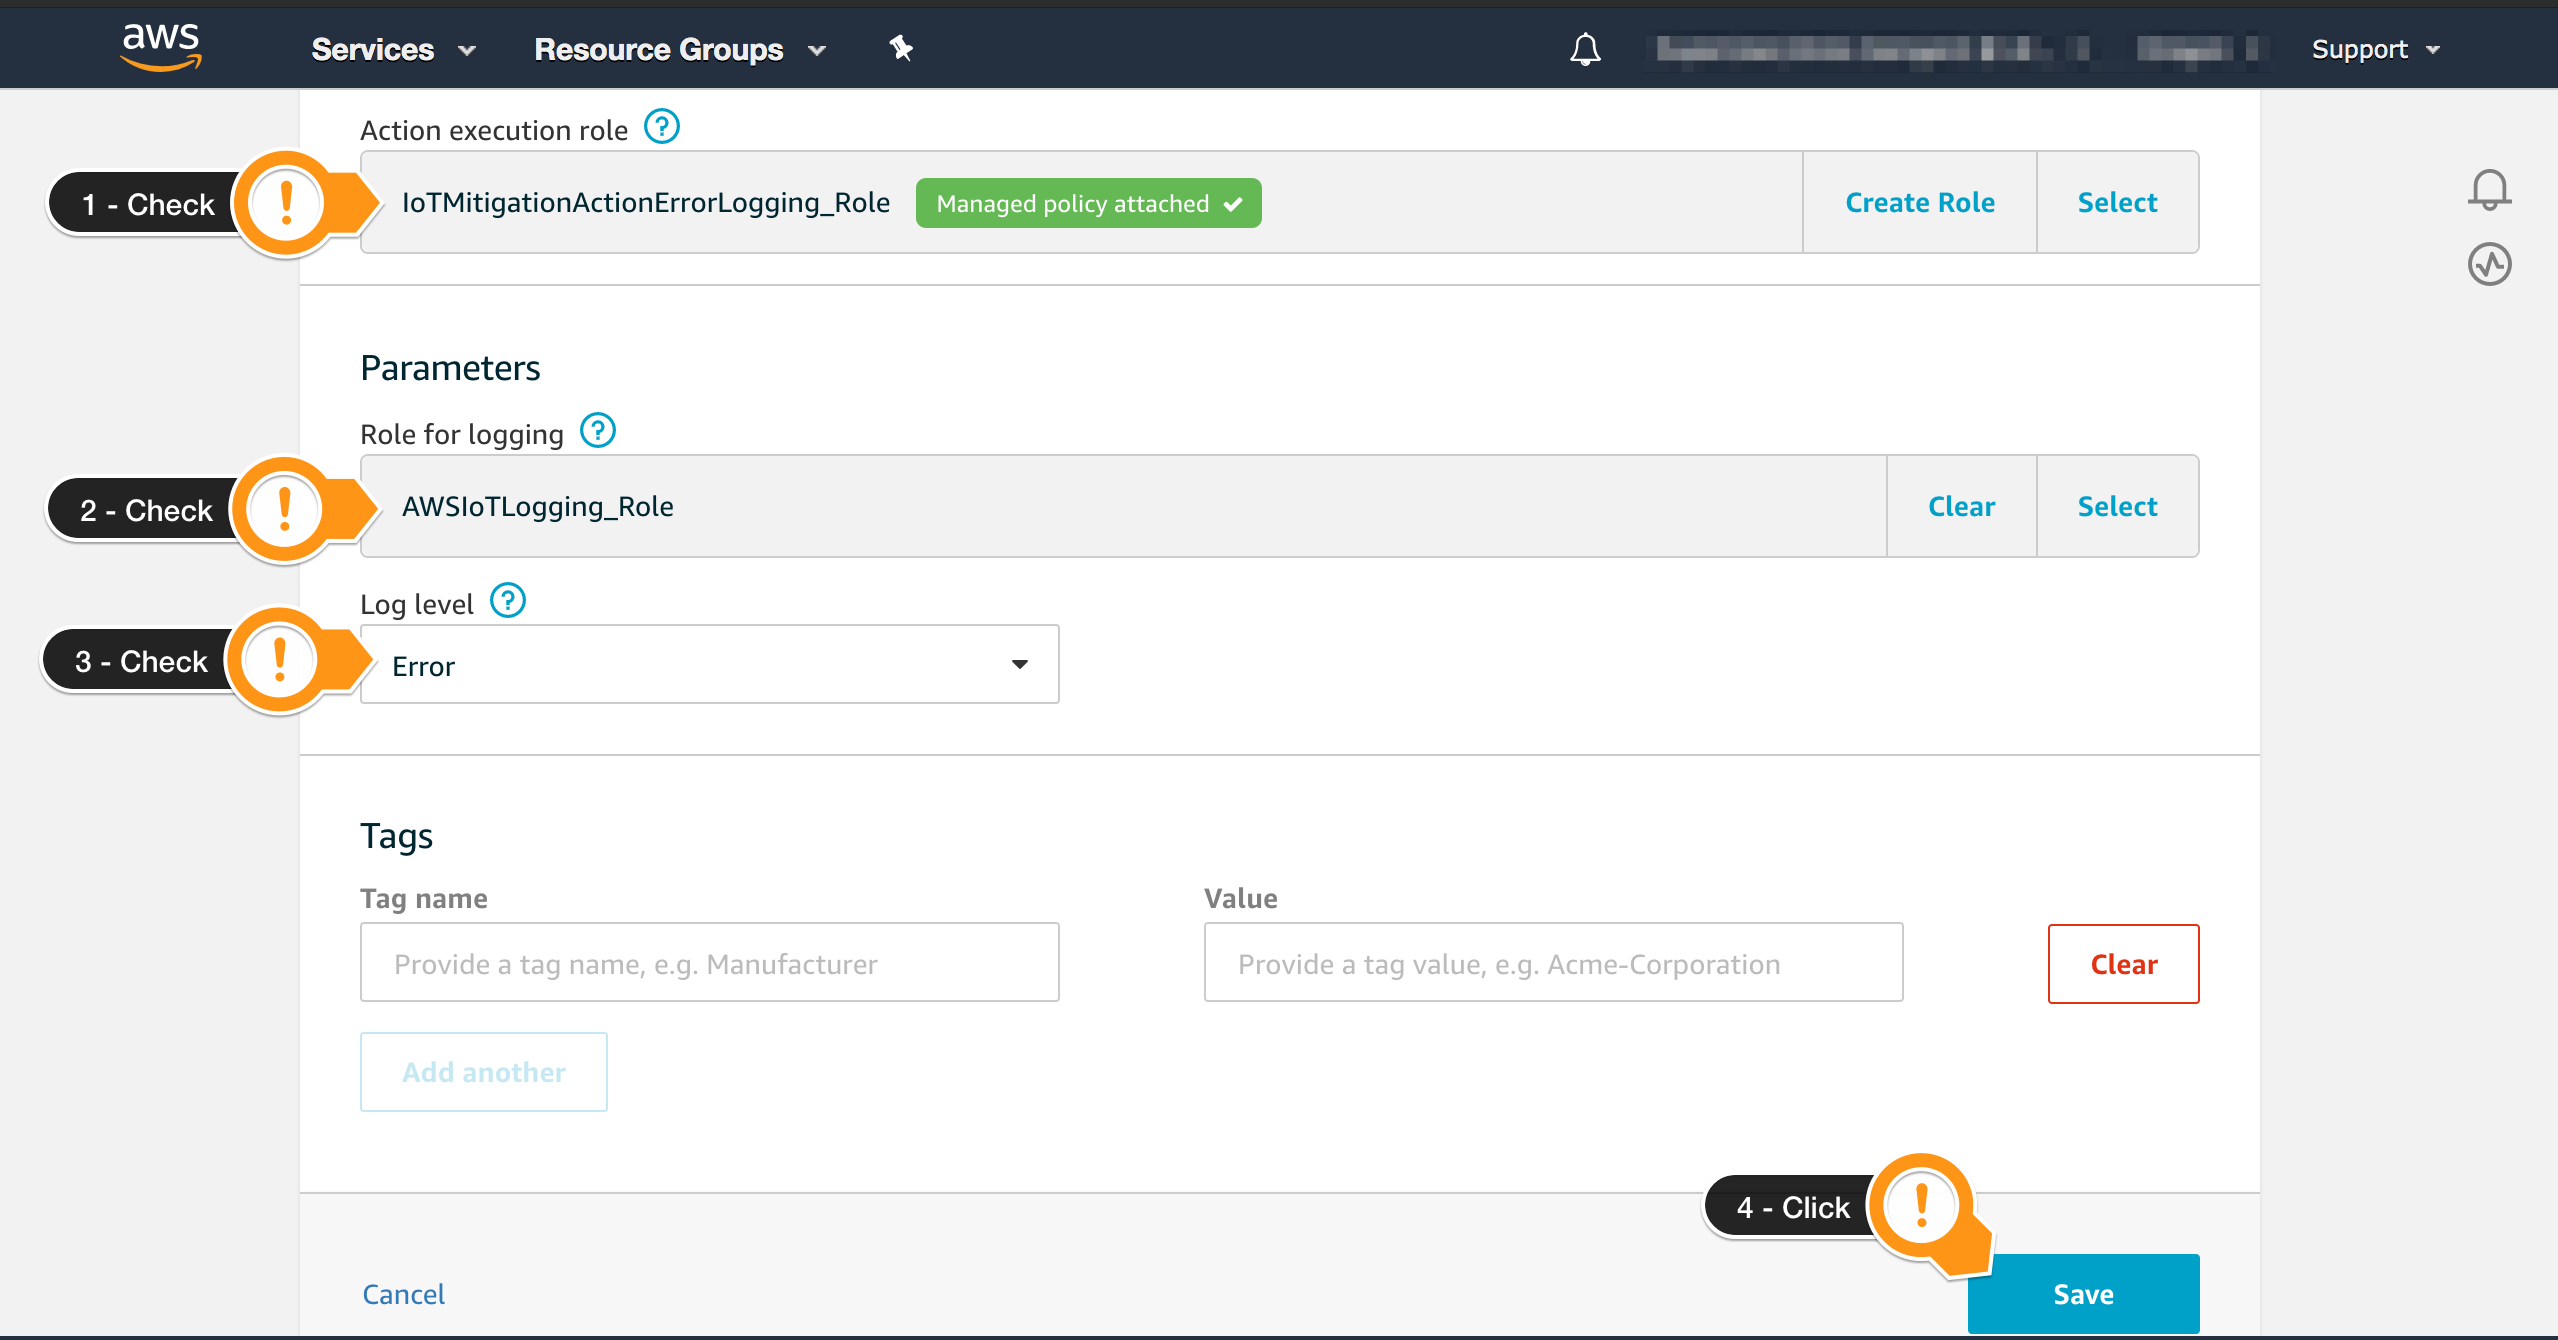
- Confirm the Role you created is presented in Action execution role
You need to define the parameters for this Mitigation action.
- On the Parameters session, locate the Role for logging field and choose Select
- Find the Role containing
AWSIoTLogging_Rolein the name and choose SelectThe
AWSIoTLogging_Rolewas created during the preparation step. - For Log level, click Error. You may use a different log level in this workshop, but in production running on
DEBUGmay generate a huge amount of information - Choose Save
Starting an On-Demand Audit
After finishing the setup, you will run an on-demand audit to use the Mitigation action. To complete this task, follow these steps:
- Open the AWS IoT Core console
- In the left navigation pane, choose Defend then Audit
- Choose Schedules
- On the upper right, choose Create
- Select only Logging disabled
- Scroll to the Set Schedule session
- Choose Run audit now (once)
- Choose Create to start the audit
To start an on-demand audit task, enter this command:
$ aws iot start-on-demand-audit-task \
    --target-check-names LOGGING_DISABLED_CHECK
Output example:
$ aws iot start-on-demand-audit-task \
    --target-check-names LOGGING_DISABLED_CHECK
{
    "taskId": "660b1f3a889a894f8877958f1550f6b7"
}
Executing a Mitigation Action
After finishing the Audit (it may take a couple of minutes), you need to access the results to see if there are non-compliant checks.
- Open the AWS IoT console
- In the left navigation pane, choose Defend then Audit
- Choose Results
- Choose the audit you created
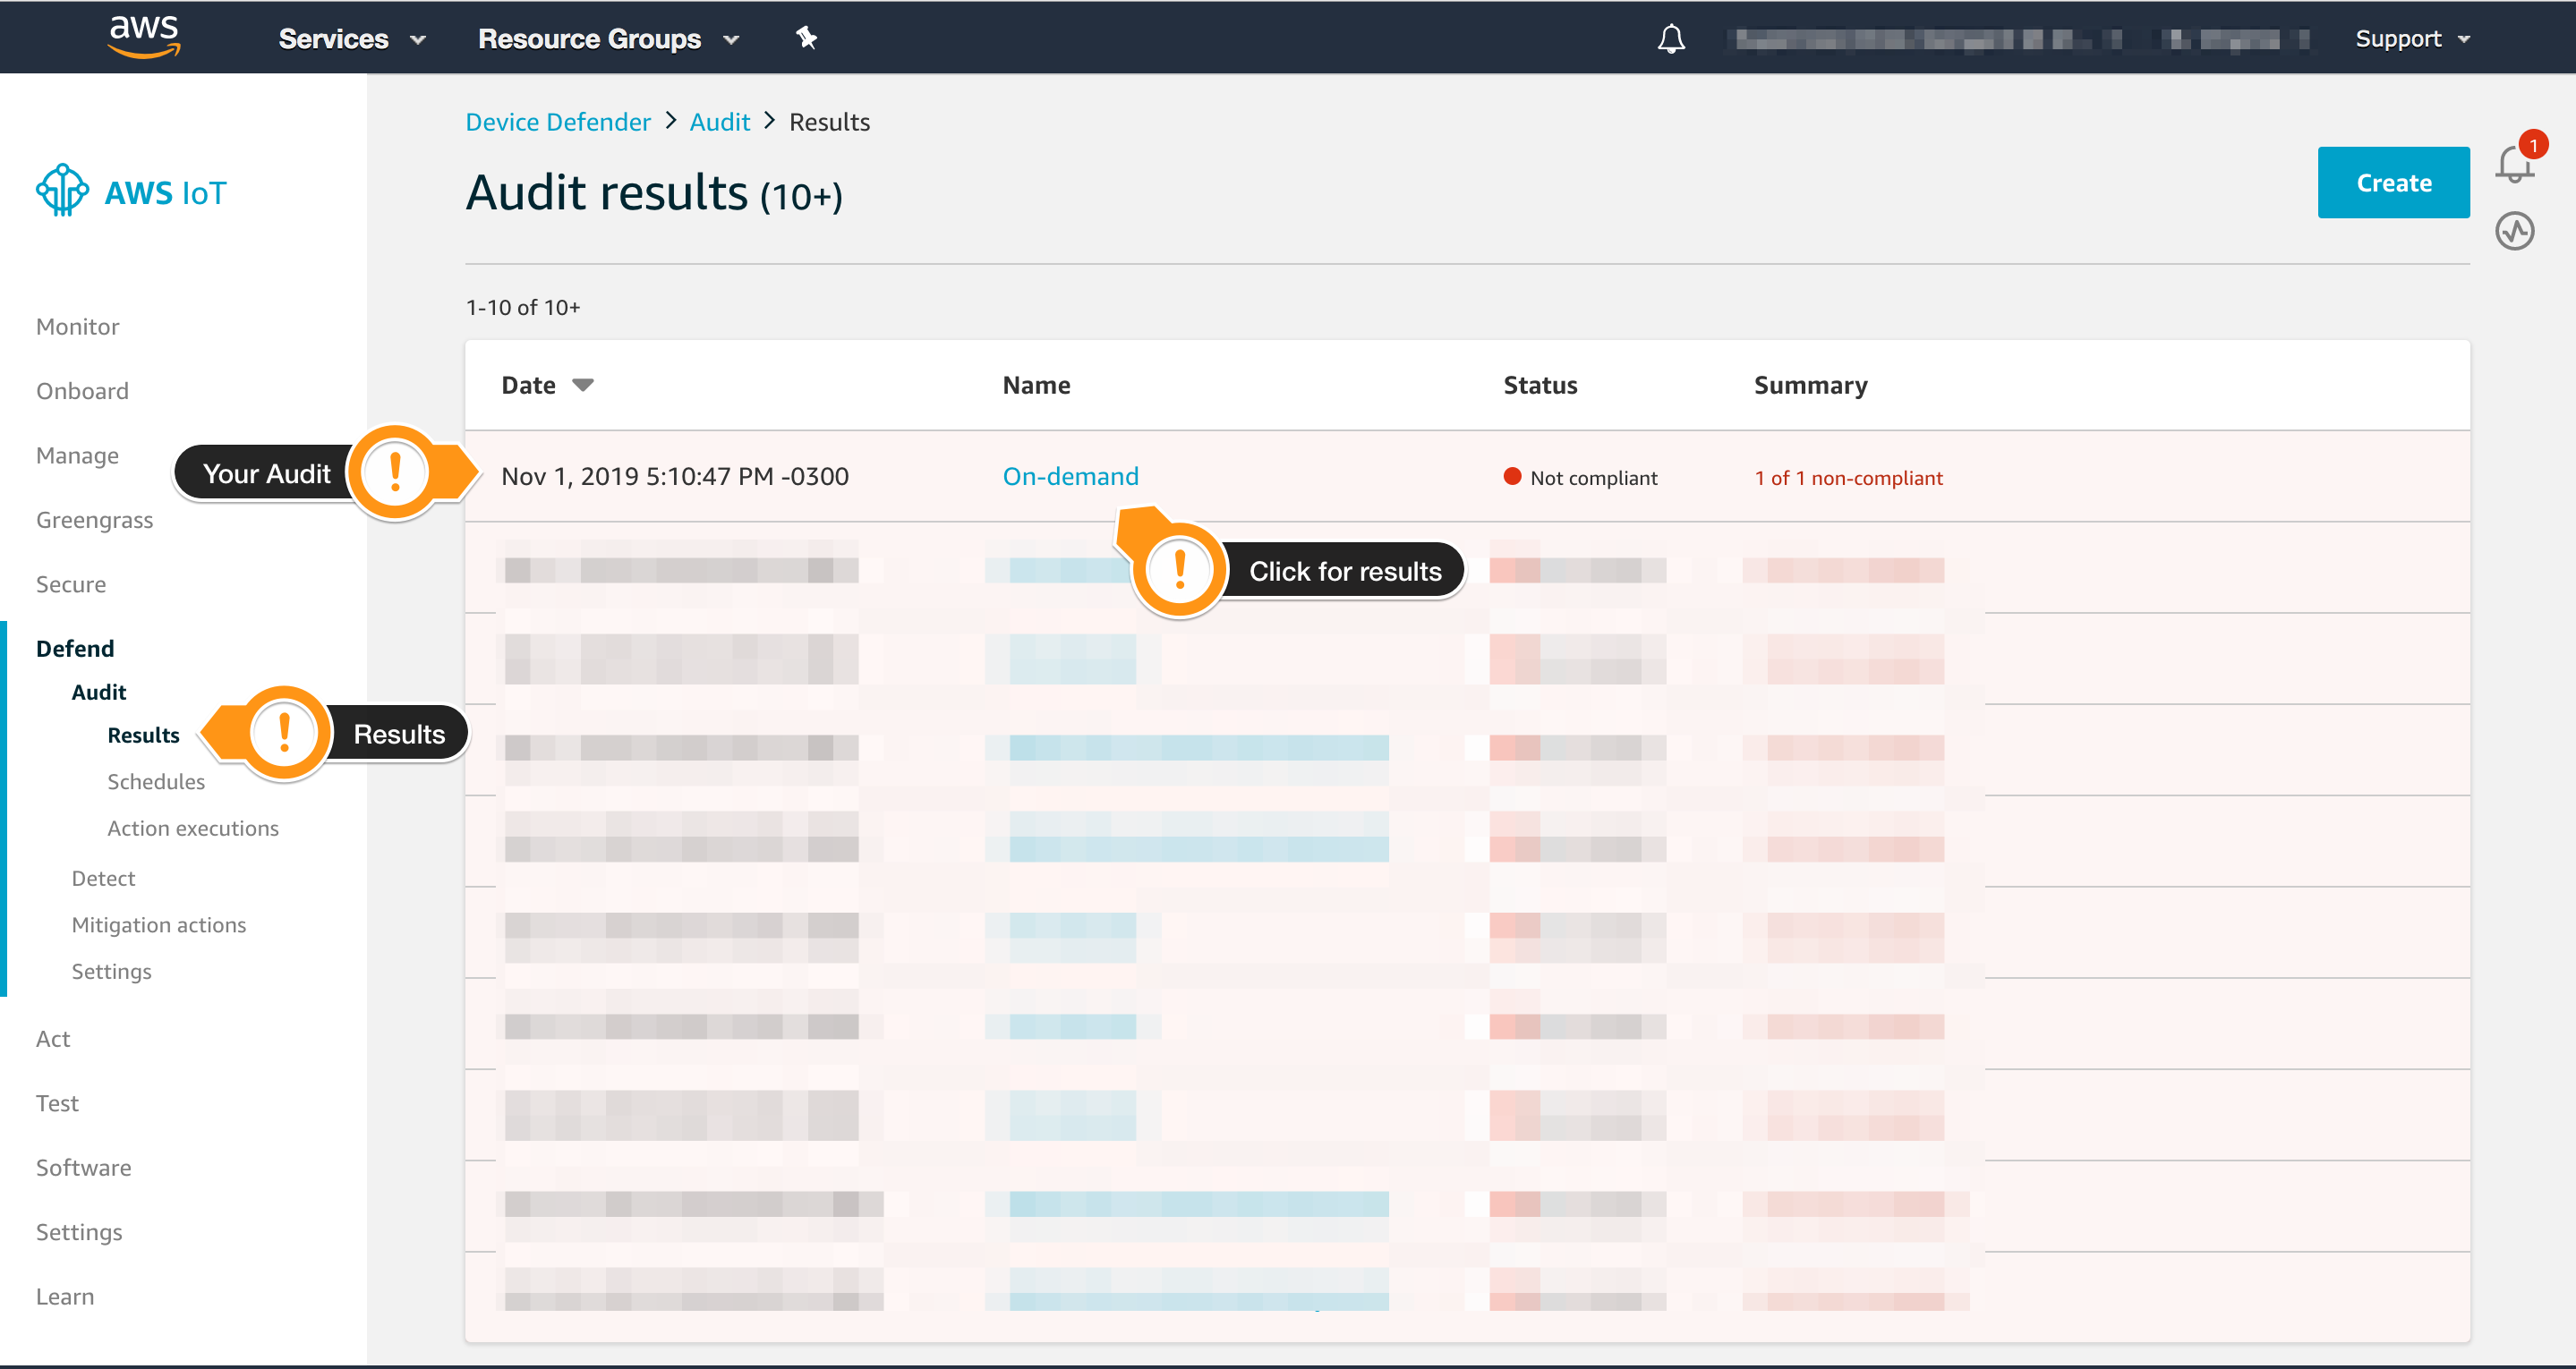
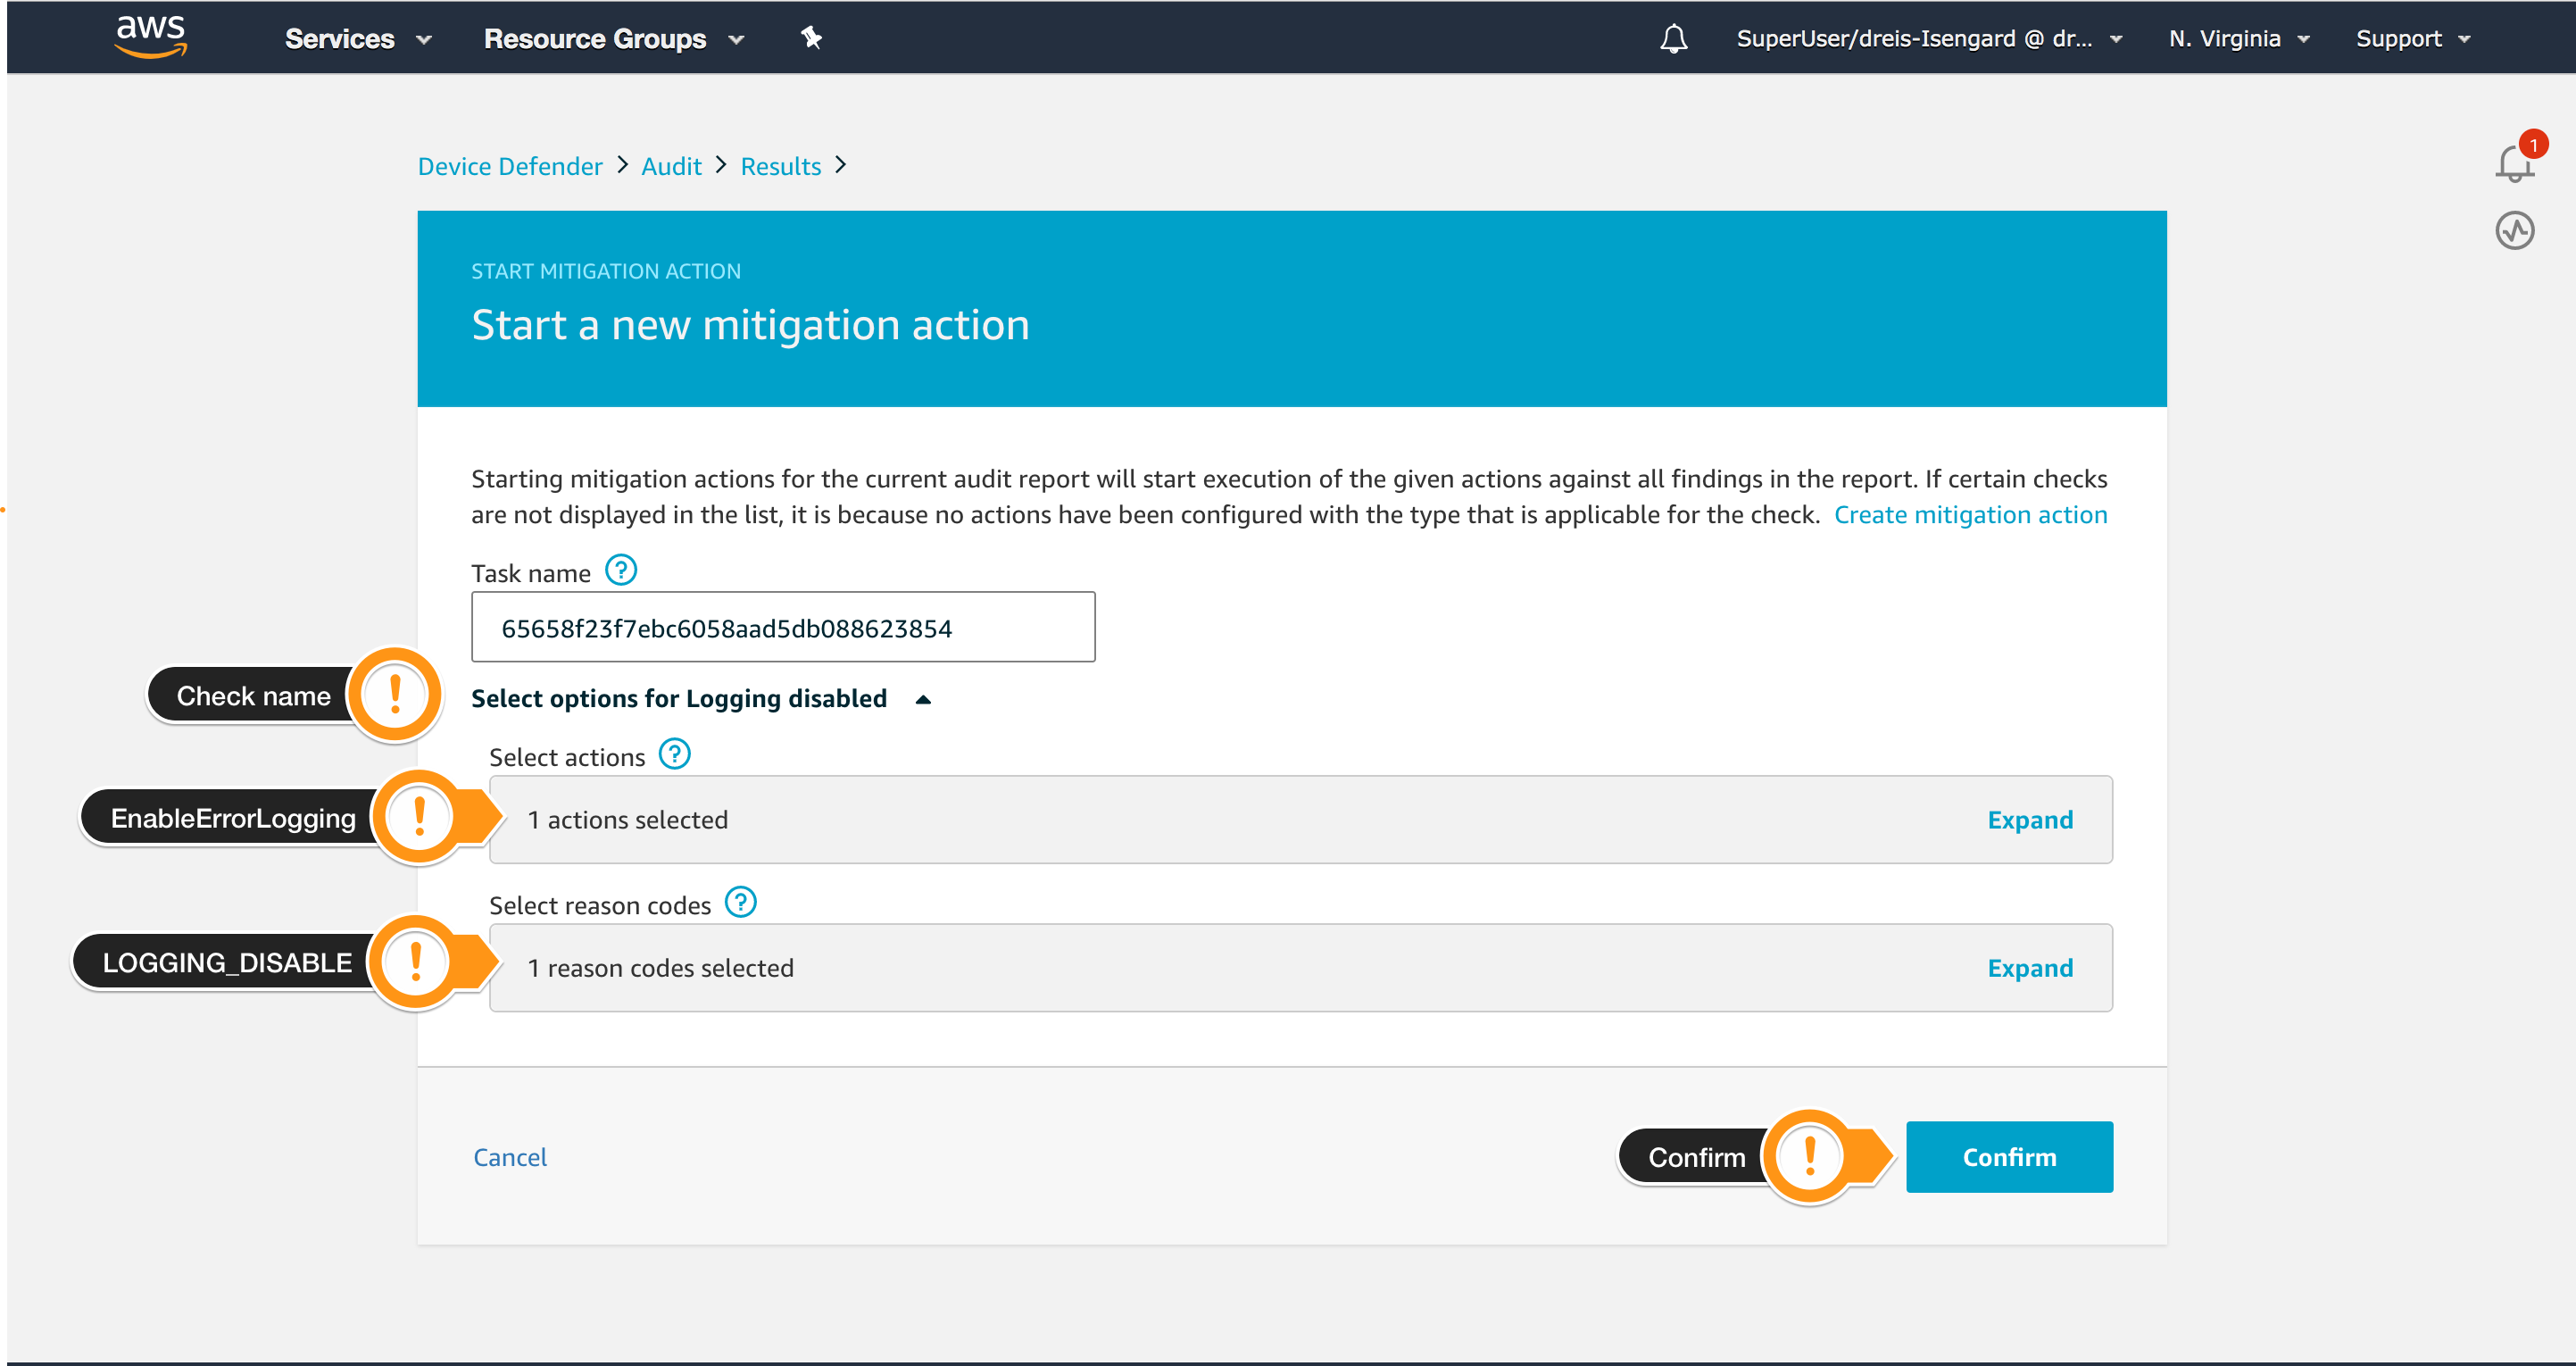
- Check the results. Notice that Logging disabled is listed on Non-compliant checks
- Choose Start mitigation actions on the upper right
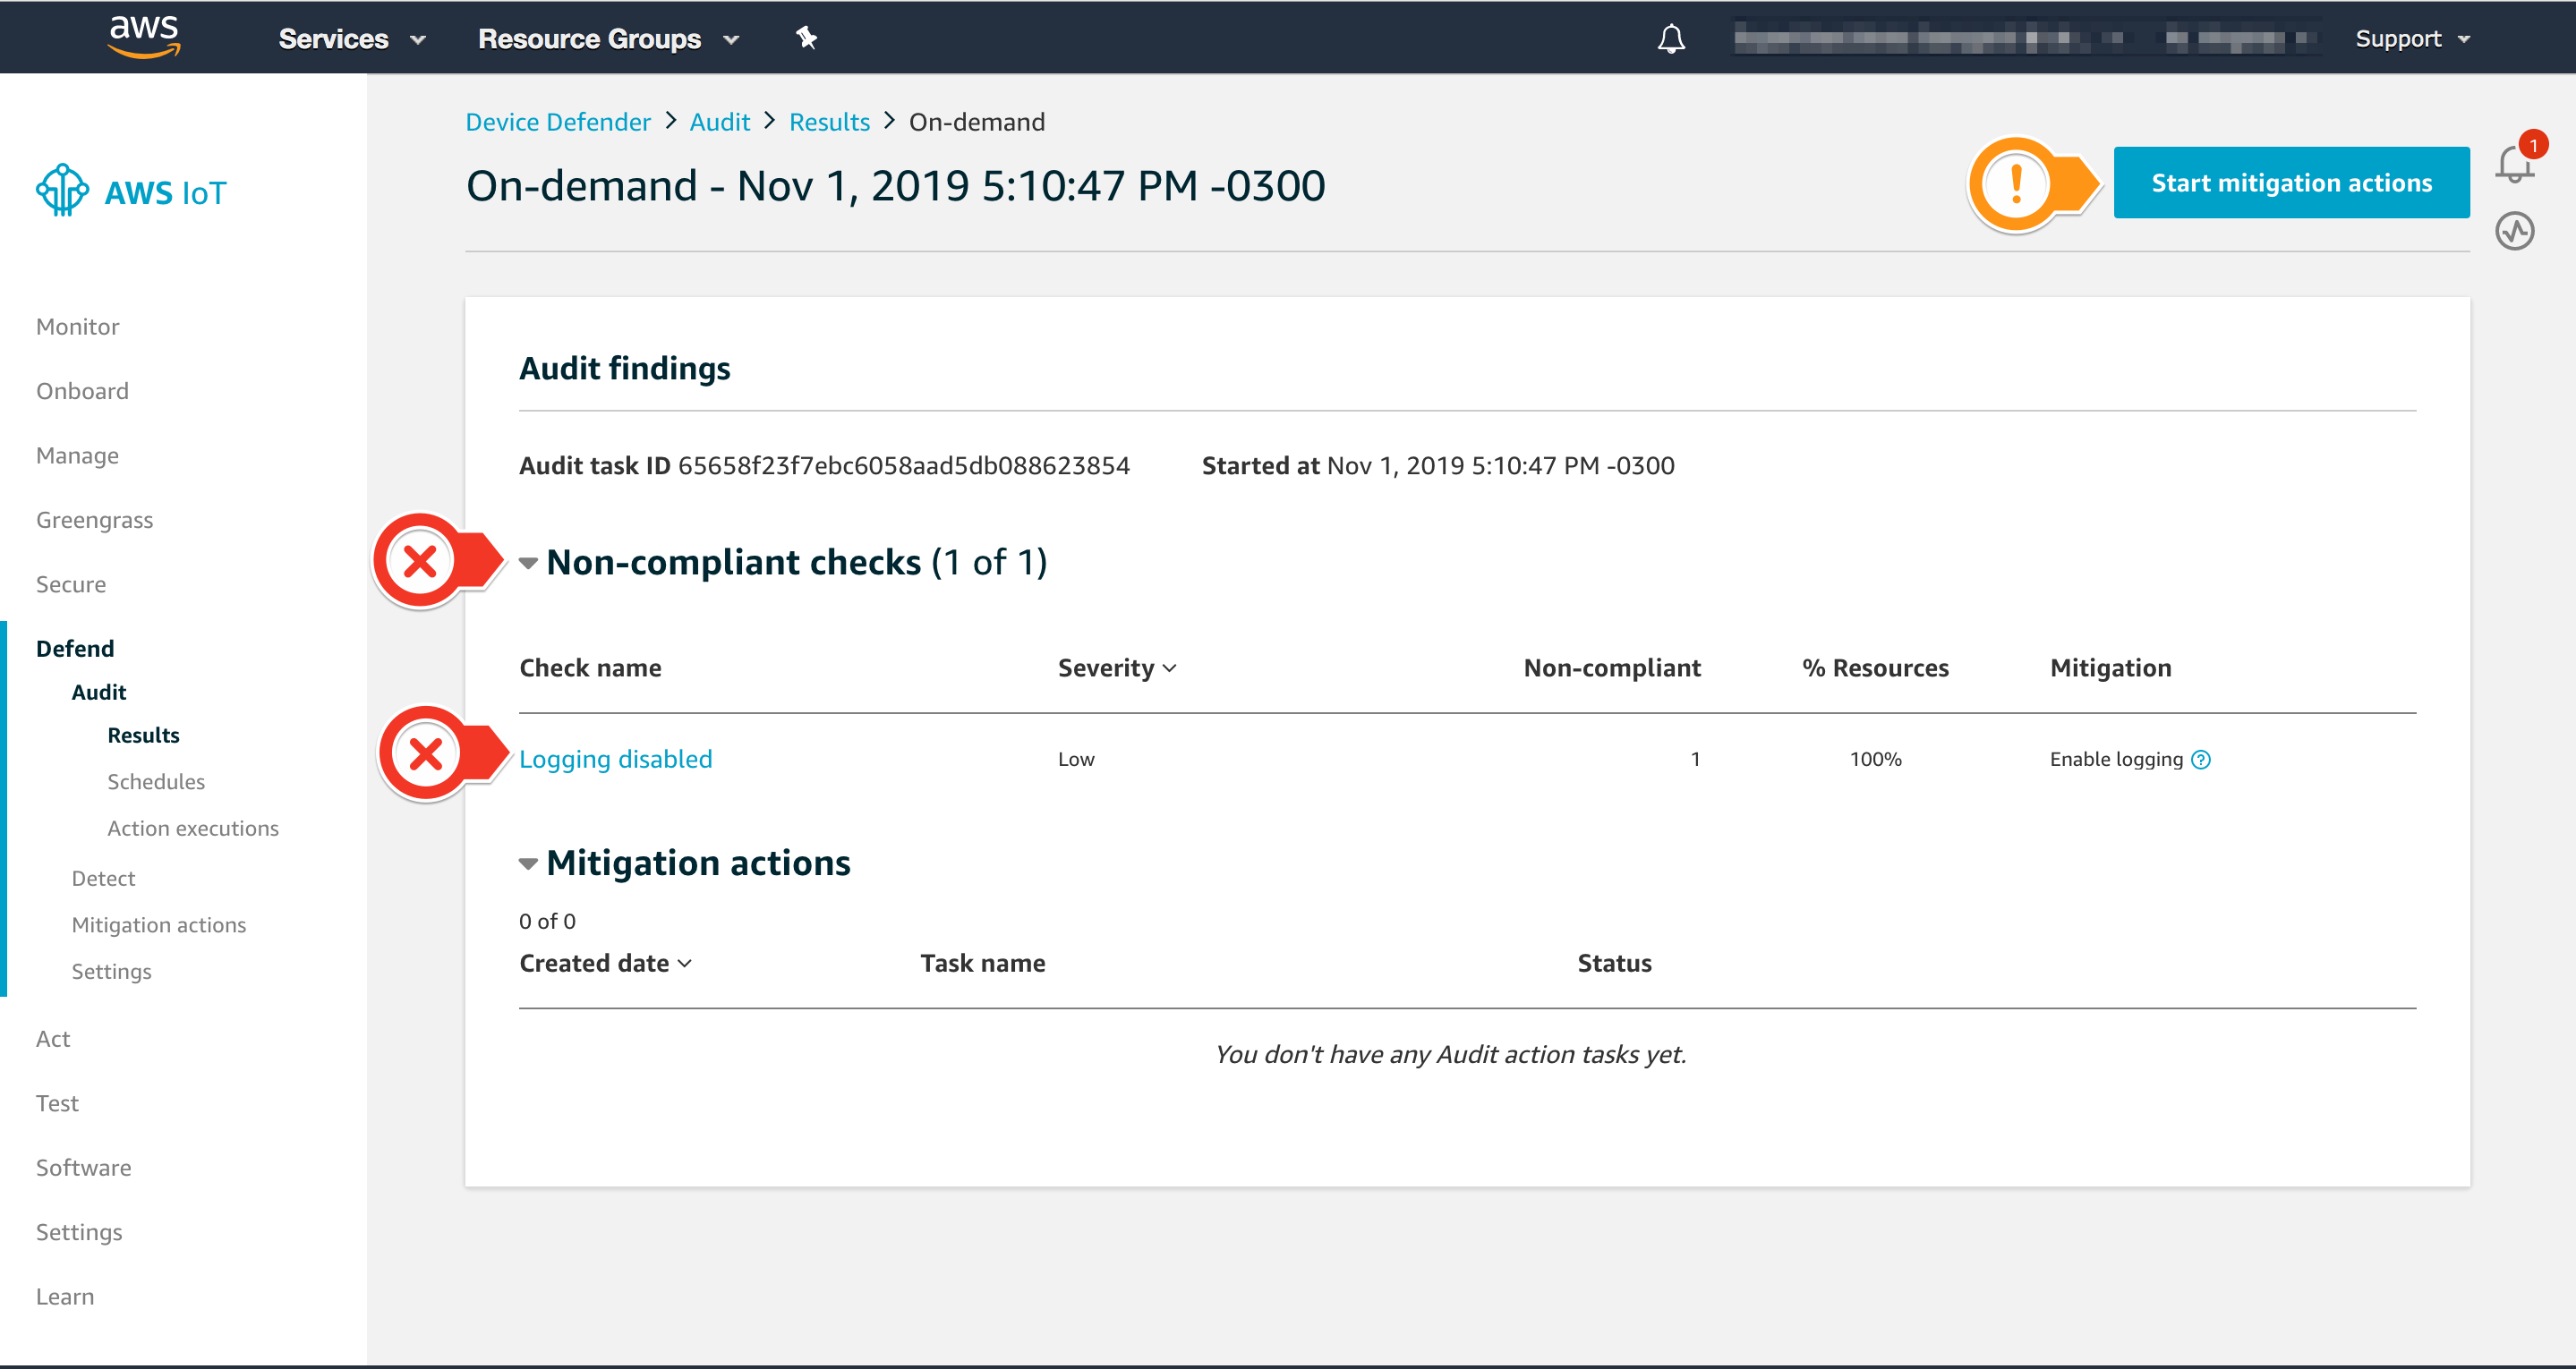
- For Select actions, select
EnableErrorLoggingAction - For Select reason codes, select
LOGGING_DISABLED - Choose Confirm
It may take a few minutes to finish the Mitigation action.
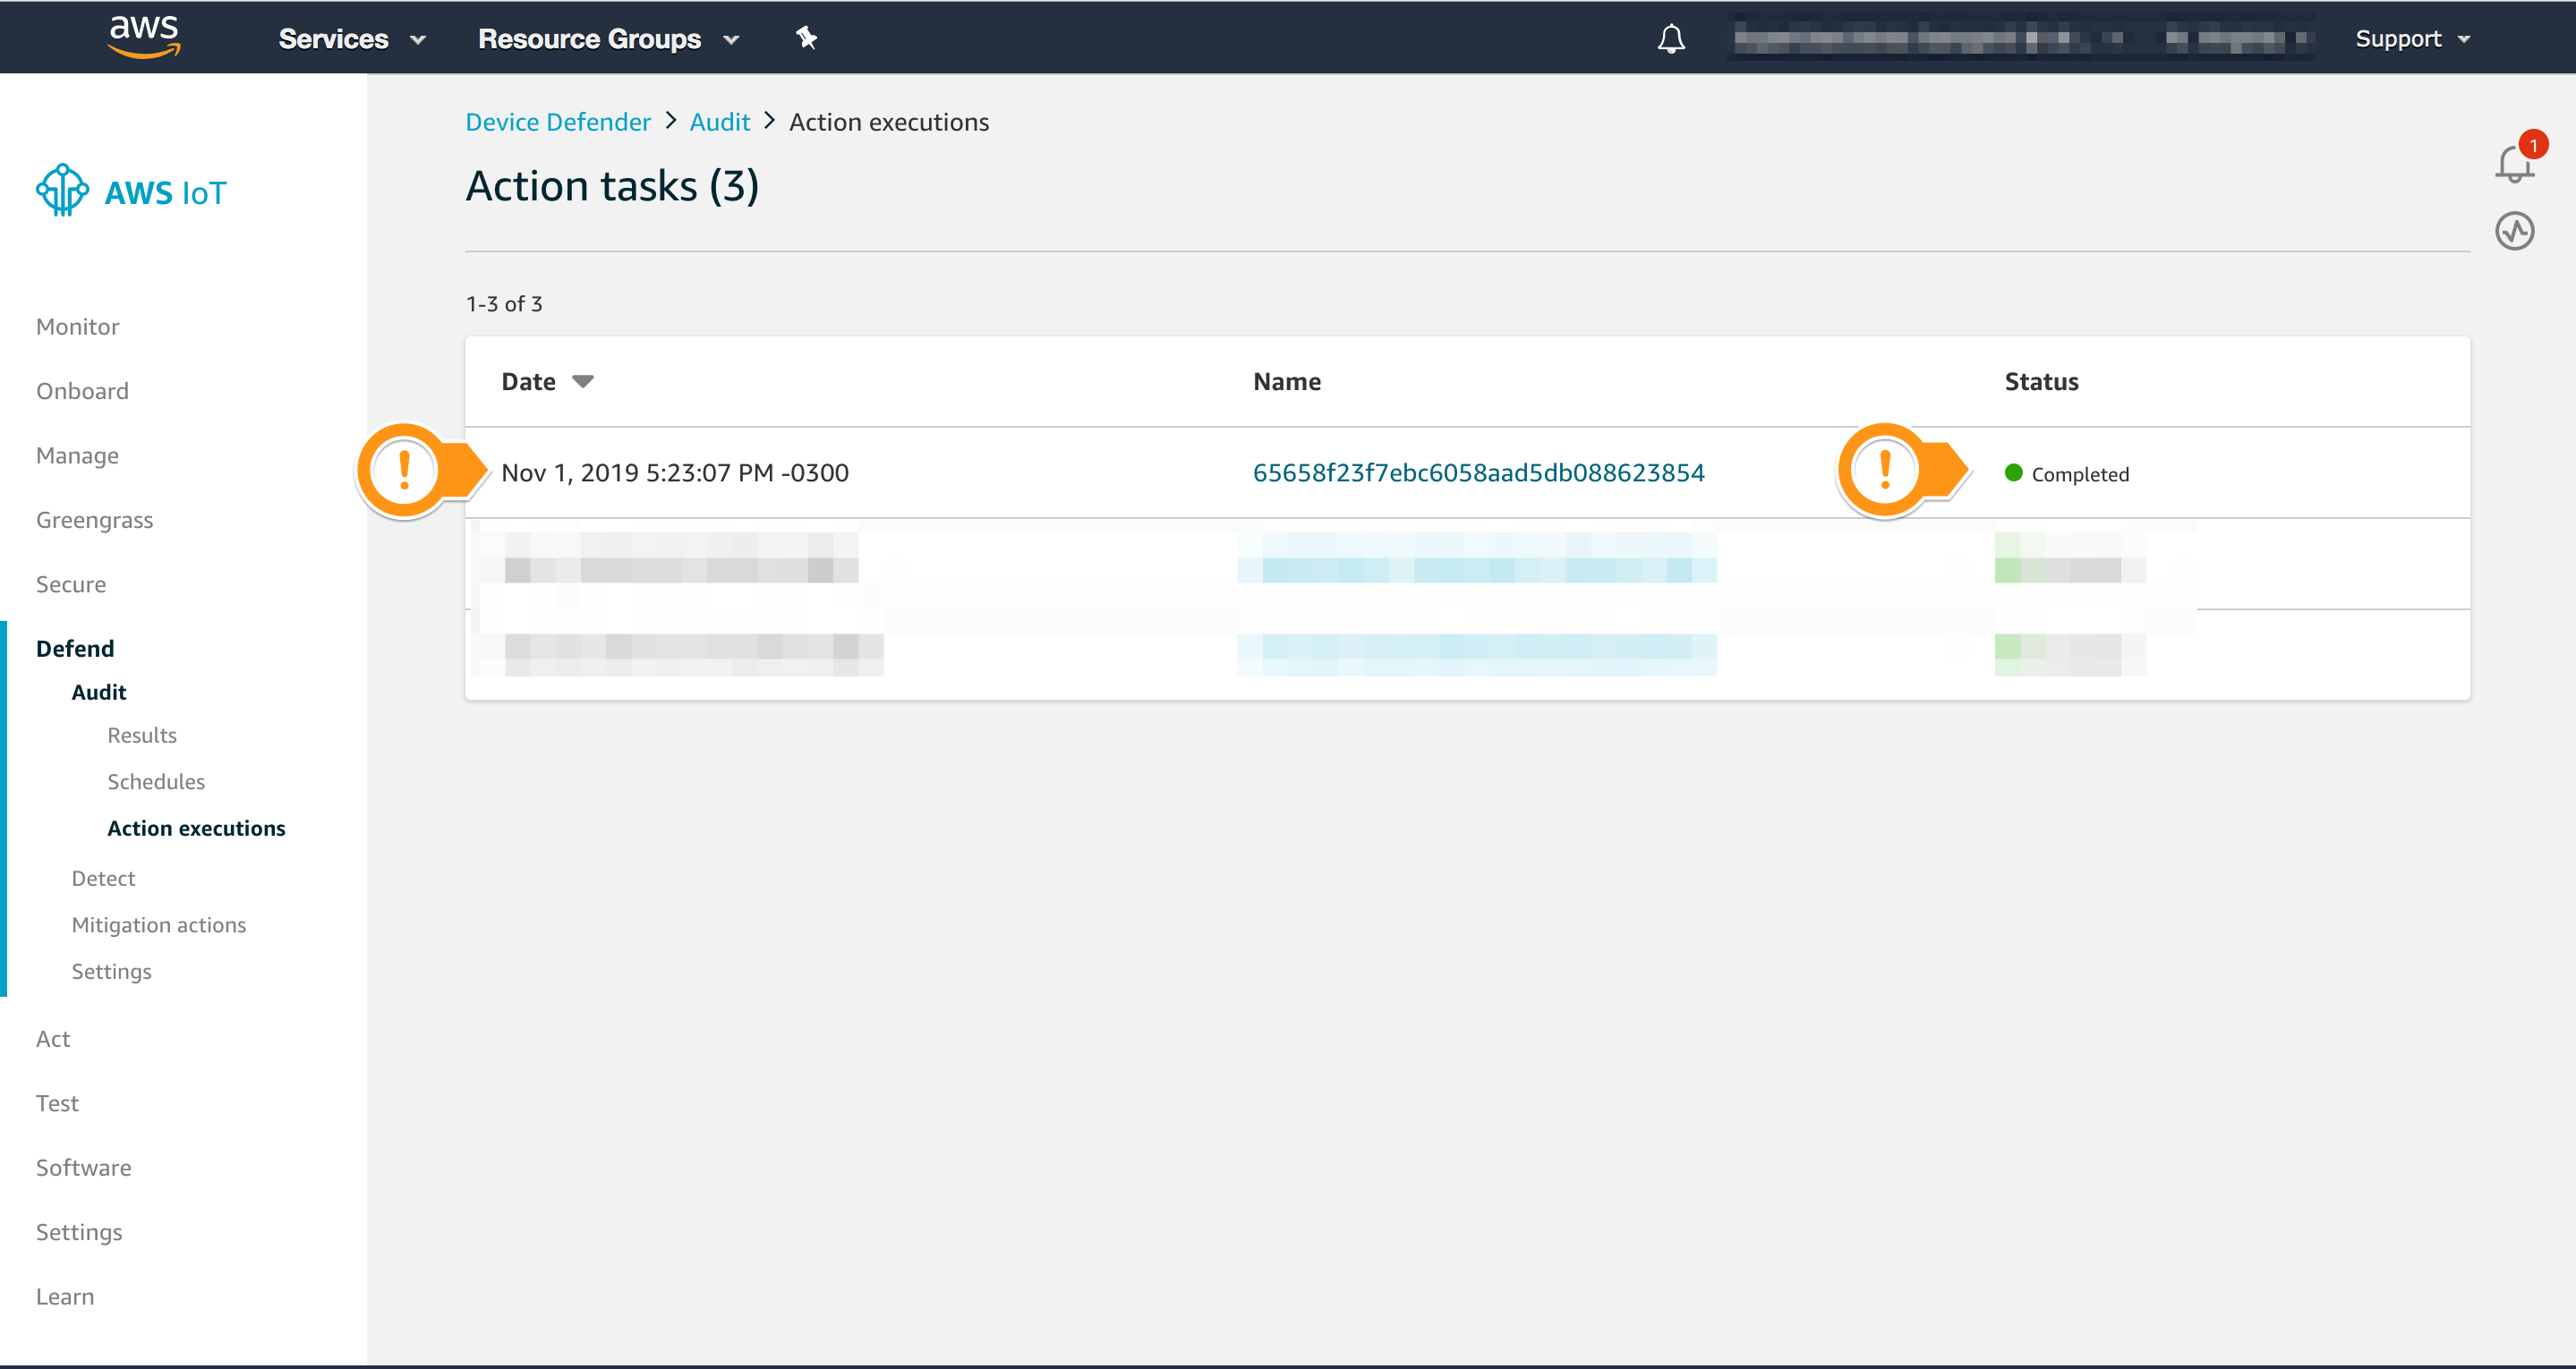
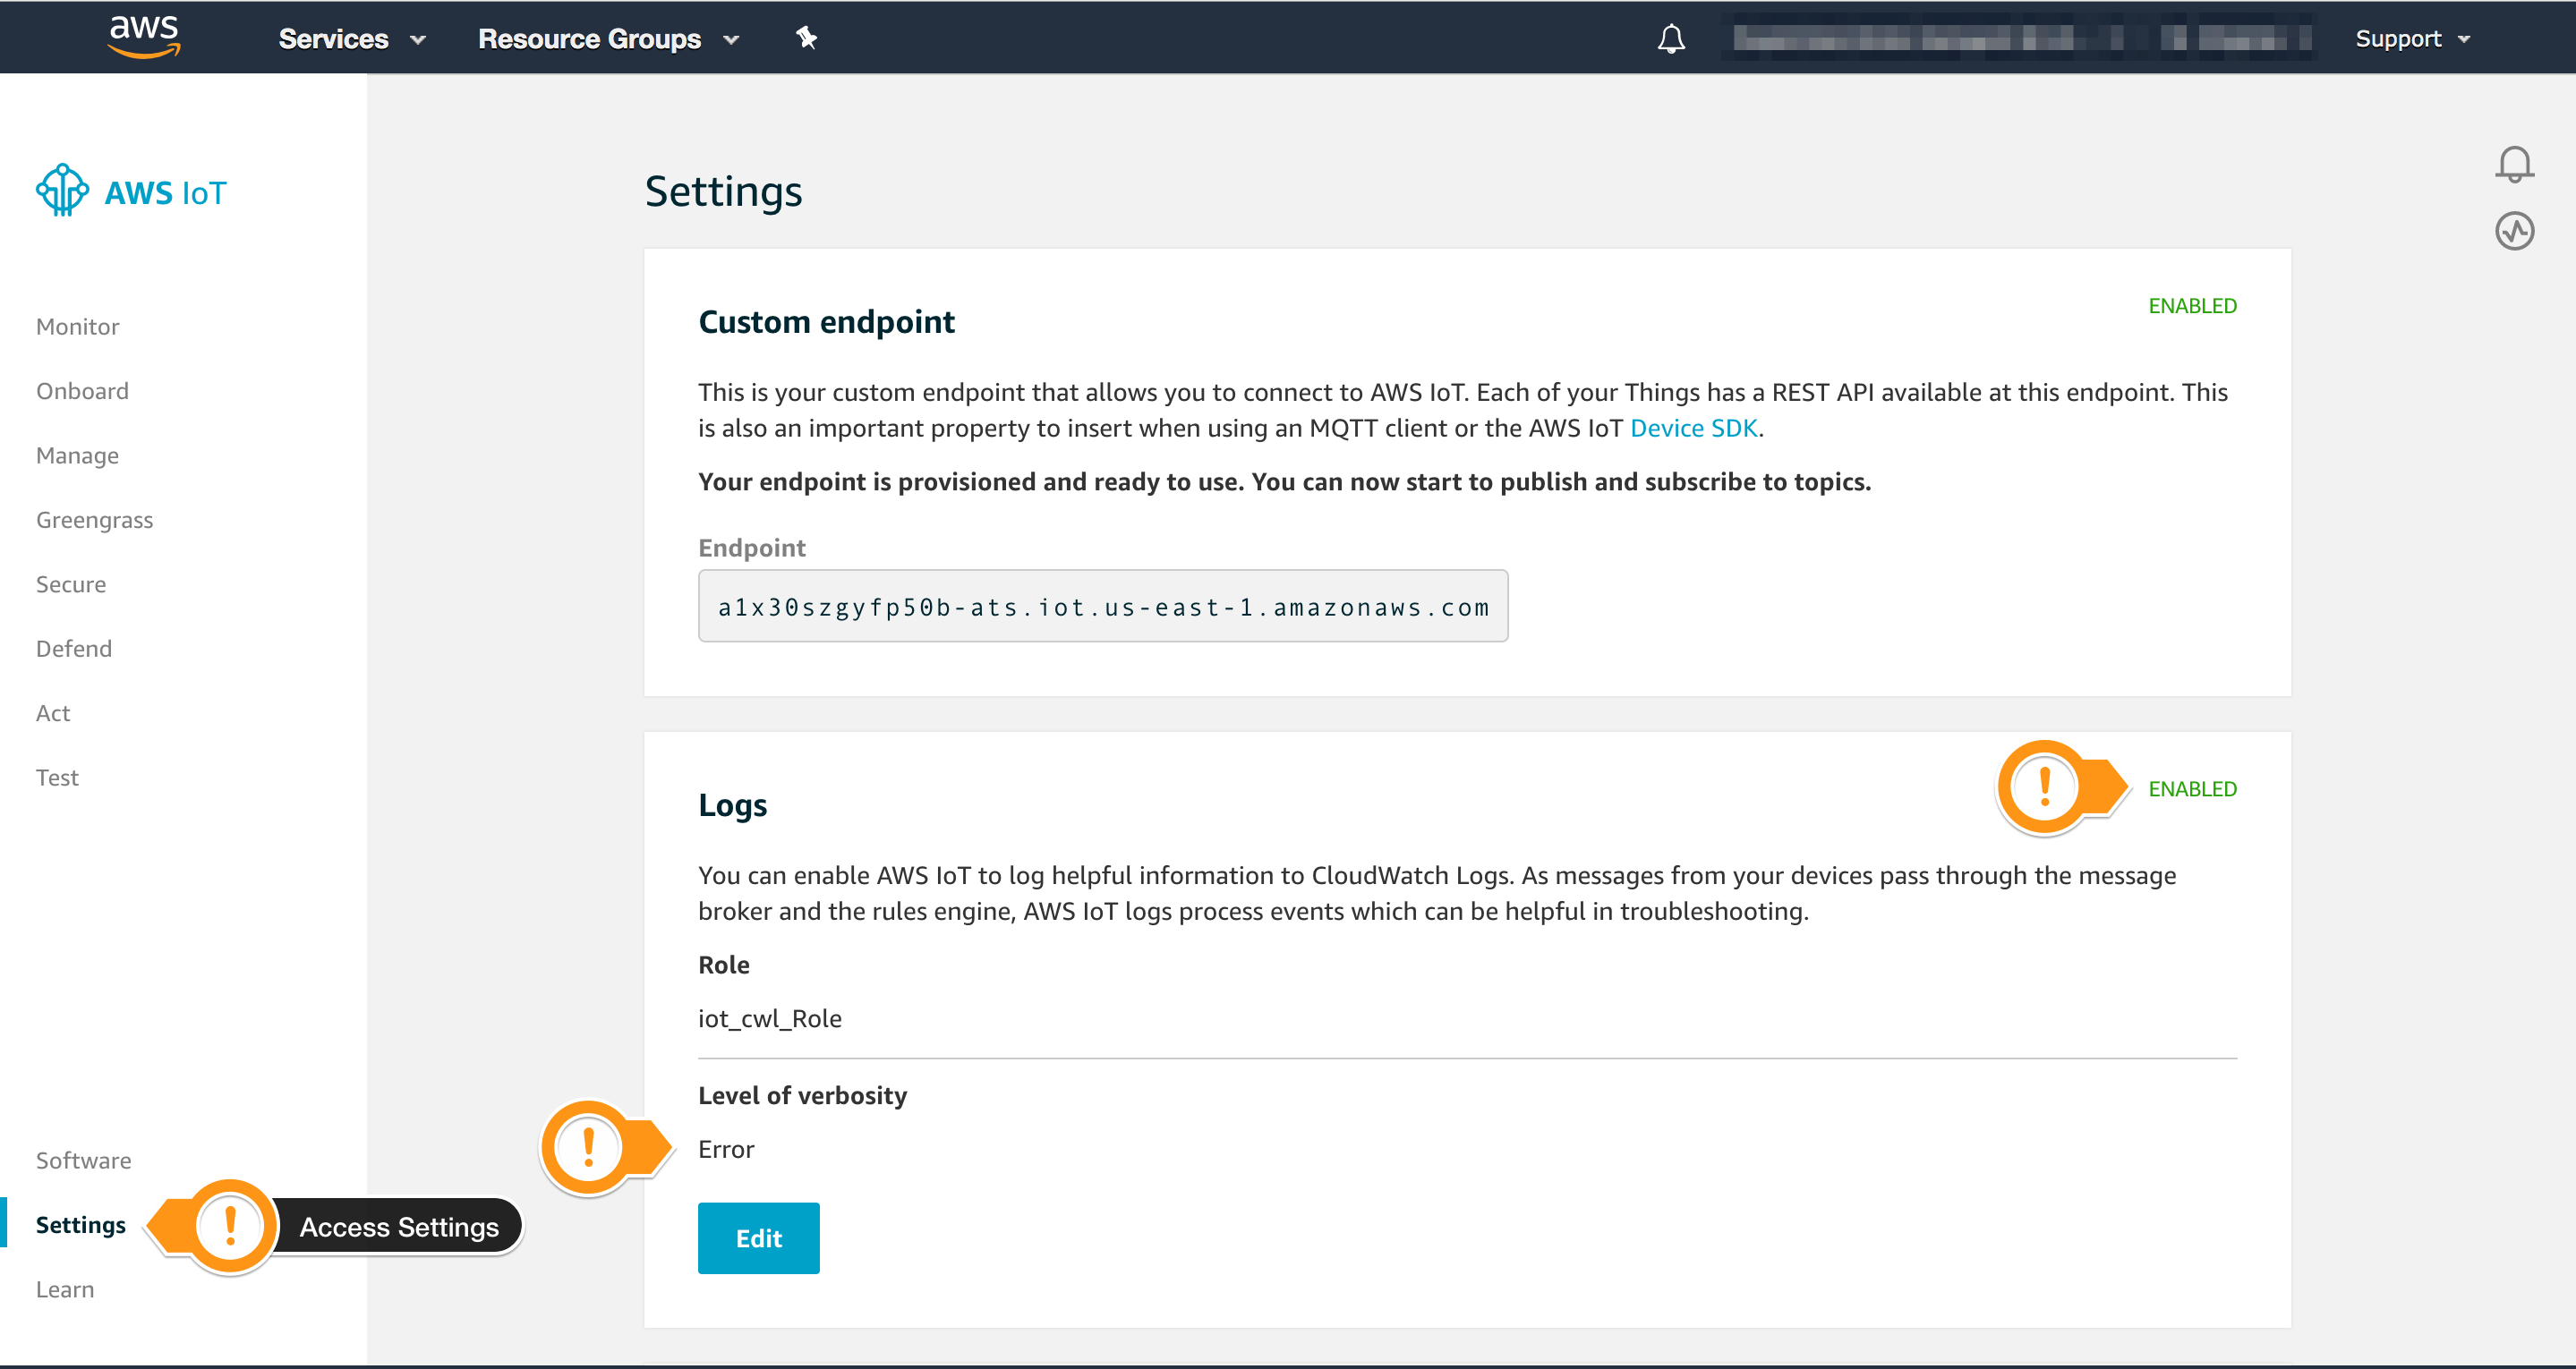
Checking the Mitigation Action
After completing the Action task, you can check if AWS IoT Device Defender Audit changed the Logging level to ERROR.
- Open the AWS IoT console
- In the left navigation pane, choose Settings
- Check that the Logs are
ENABLED - Check that the Level of verbosity is
Error
Conclusion
You learned how to setup IoT Device Defender Audit Mitigation actions, understand how to locate an Audit result and mitigate an issue without writing any code.
Optional: Using Action type Publish finding to SNS
You can create a similar mitigation action, but the payload sent is different.
{
  "Records": [
    {
      "EventVersion": "1.0",
      "EventSubscriptionArn": "arn:aws:sns:us-east-1:xxxxxxxxxxxx:DevDefenderAudit:152befa1-d830-4ccc-9bc7-5f790d6273db",
      "EventSource": "aws:sns",
      "Sns": {
        "SignatureVersion": "1",
        "Timestamp": "2019-10-25T15:17:53.212Z",
        "Signature": "YKHSXZsQKfpf9/aH5RCa7y6kOWPiYdK+1O/C97ngzmSKQbTuvb3rwbpITxpFD47jdi0YkCst6ZAGrh1SoKZk4GVGMXPUyNJob7xA08+VTZlWfNk511kJtHOiTWJxXe5e1U7+AHsaFq2YZg54A3dnCXnRqO2KrwJE6VcYZqNHfmkaKdpcw8qA5jNXXyBpYpZUpNs1BBsiiOuTbVbuYRsEsKKz+XBrzBEhj8ltEpn24S4QjhoA9QYBal9zzNaNJ3wqKJbzienSuTt7UOpDnytnGJtfe/uEFjXzDSxKvz5izsd9C5O58O1vPGh+Xi+bl6xjVx6vqE3umxi463VZfEGeWQ==",
        "SigningCertUrl": "https://sns.us-east-1.amazonaws.com/SimpleNotificationService-6aad65c2f9911b05cd53efda11f913f9.pem",
        "MessageId": "3326f922-b7fc-5202-a73f-af0fa39d2b4b",
        "Message": "{\"findingId\":\"432728eb-d686-418c-bf5b-02ea8867098b\",\"findingTime\":1572007301019,\"severity\":\"CRITICAL\",\"taskStartTime\":1572007300584,\"nonCompliantResource\":{\"resourceType\":\"IOT_POLICY\",\"resourceIdentifier\":{\"policyVersionIdentifier\":{\"policyName\":\"TECHCON703_amazon_freertos_policy\",\"policyVersionId\":\"1\"}}},\"taskId\":\"621a6e7c32cb33807e03593b3a4097eb\",\"checkName\":\"IOT_POLICY_OVERLY_PERMISSIVE_CHECK\",\"reasonForNonComplianceCode\":\"ALLOWS_BROAD_ACCESS_TO_IOT_DATA_PLANE_ACTIONS\",\"reasonForNonCompliance\":\"Policy allows broad access to IoT data plane actions: [iot:Subscribe, iot:Connect, iot:Publish].\"}",
        "MessageAttributes": {},
        "Type": "Notification",
        "UnsubscribeUrl": "https://sns.us-east-1.amazonaws.com/?Action=Unsubscribe&SubscriptionArn=arn:aws:sns:us-east-1:xxxxxxxxxxxx:DevDefenderAudit:152befa1-d830-4ccc-9bc7-5f790d6273db",
        "TopicArn": "arn:aws:sns:us-east-1:xxxxxxxxxxxx:DevDefenderAudit",
        "Subject": null
      }
    }
  ]
}
{
    "findingId": "432728eb-d686-418c-bf5b-02ea8867098b",
    "findingTime": 1572007301019,
    "severity": "CRITICAL",
    "taskStartTime": 1572007300584,
    "nonCompliantResource": {
        "resourceType": "IOT_POLICY",
        "resourceIdentifier": {
            "policyVersionIdentifier": {
                "policyName": "TECHCON703_amazon_freertos_policy",
                "policyVersionId": "1"
            }
        }
    },
    "taskId": "621a6e7c32cb33807e03593b3a4097eb",
    "checkName": "IOT_POLICY_OVERLY_PERMISSIVE_CHECK",
    "reasonForNonComplianceCode": "ALLOWS_BROAD_ACCESS_TO_IOT_DATA_PLANE_ACTIONS",
    "reasonForNonCompliance": "Policy allows broad access to IoT data plane actions: [iot:Subscribe, iot:Connect, iot:Publish]."
}